
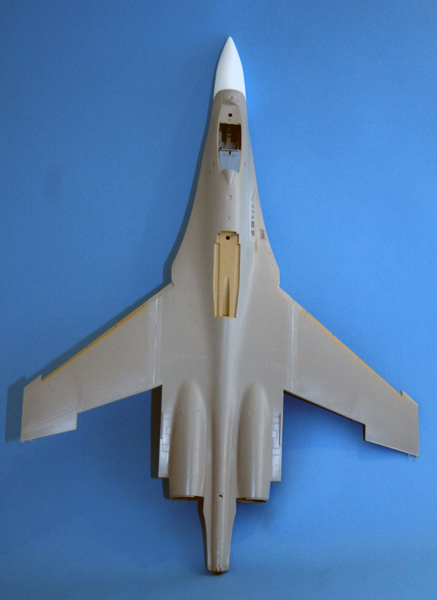
I’ll use the following goodies on that Trumpeter 1/32 Flanker B, first mould
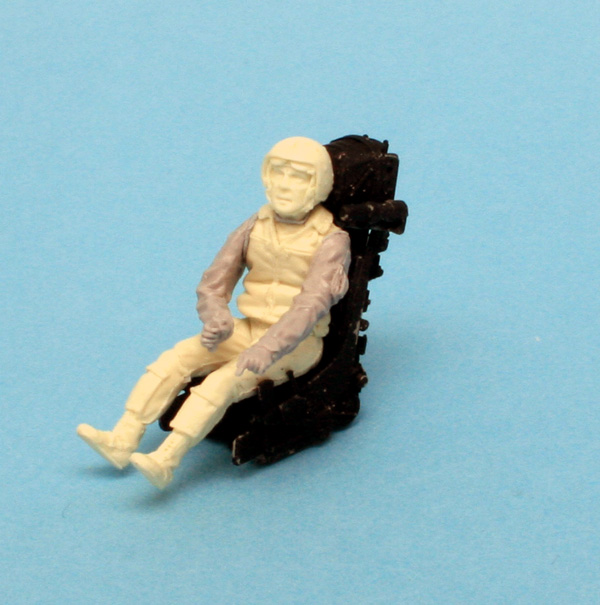
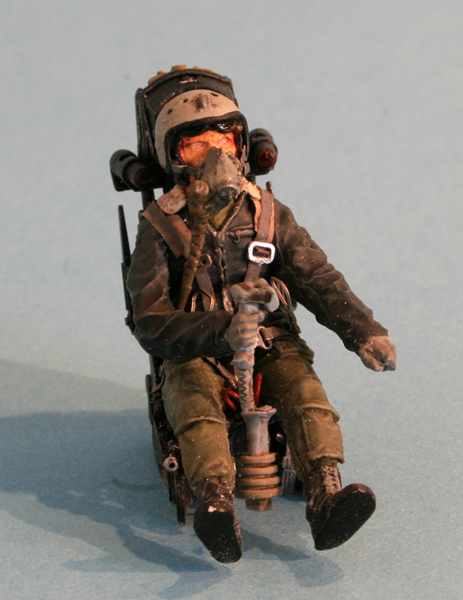
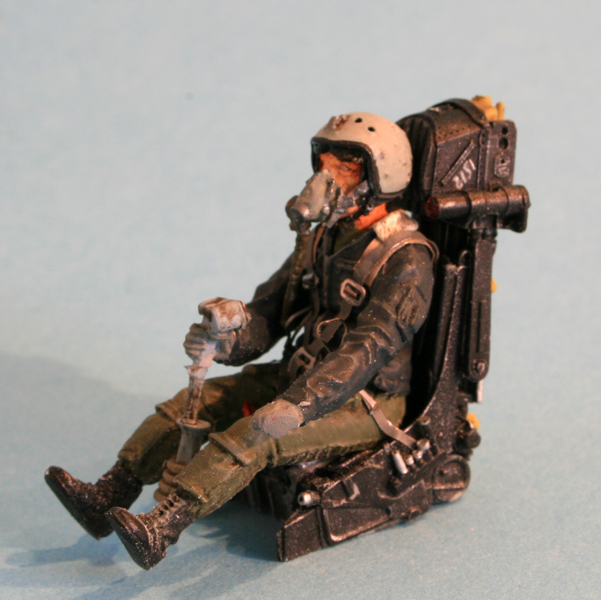
– Mastercasters Russian pilot and Su207 wheels
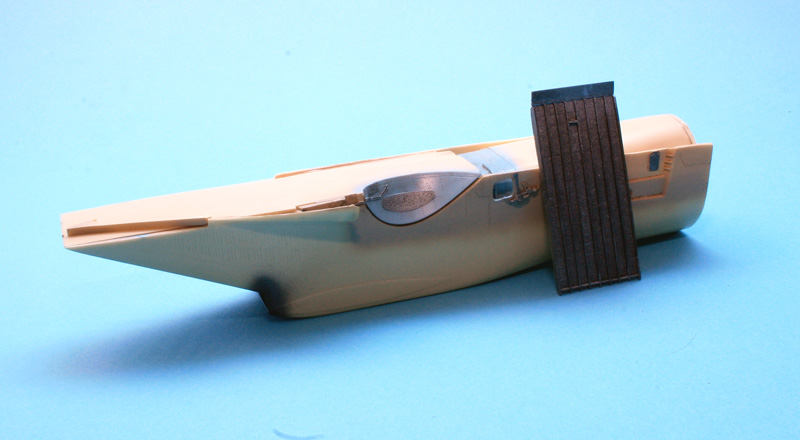
– Zactoman intakes, nose and canopy correction
– Lindenhill decal & stencils
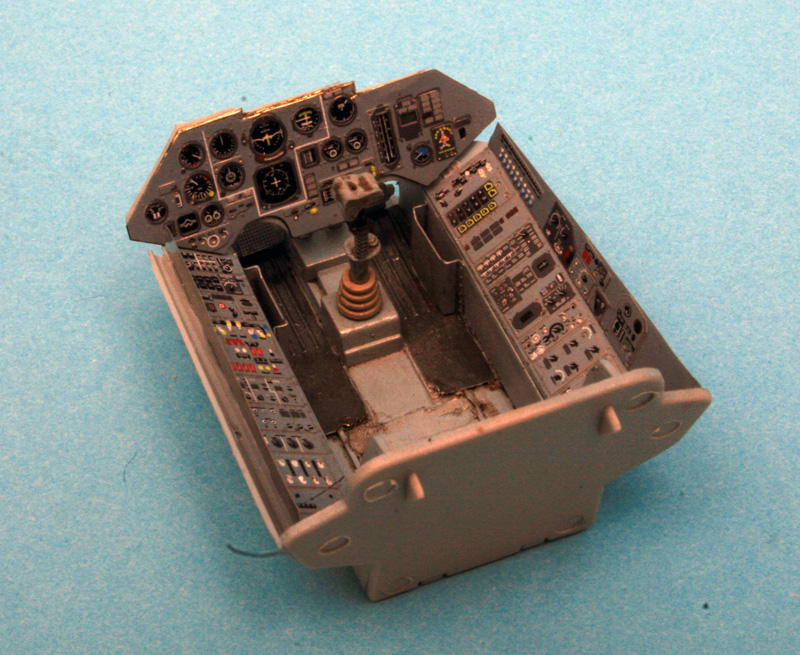
– Eduard prepainted cockpit set and exterior set
– Quickboost seat and frontpanel glareshield.
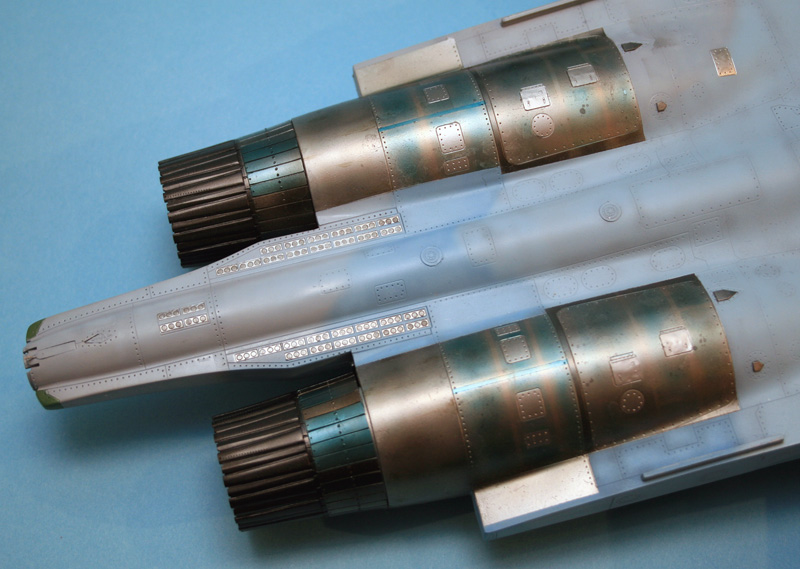
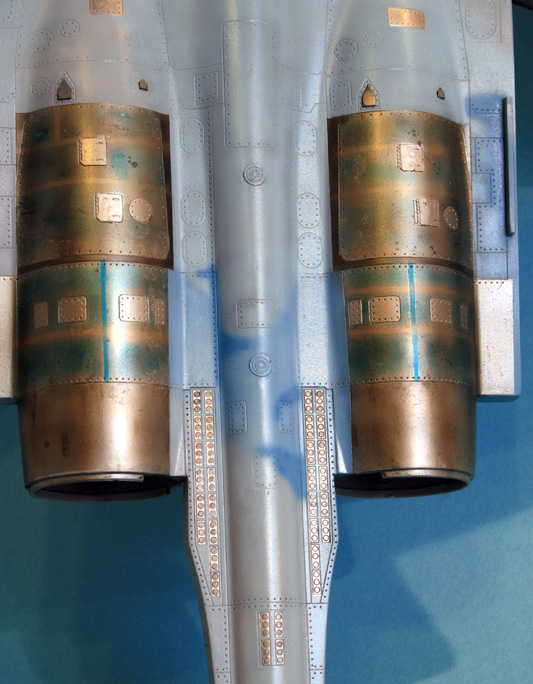
– Aires exhaust set.
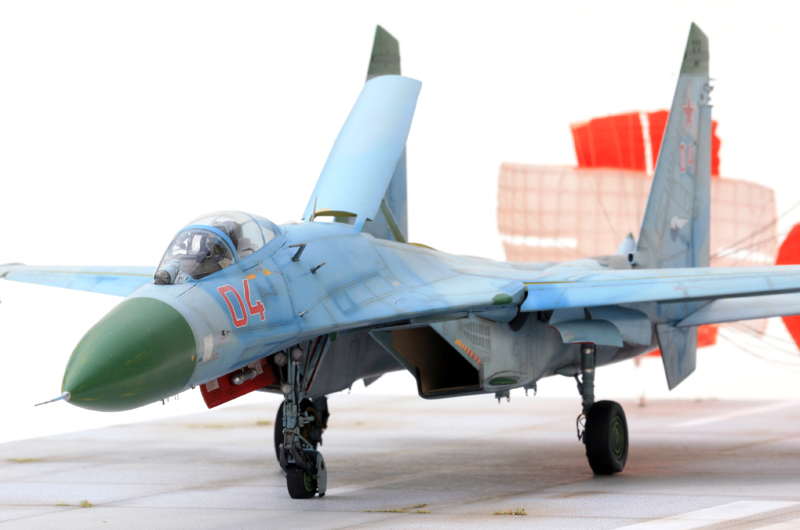
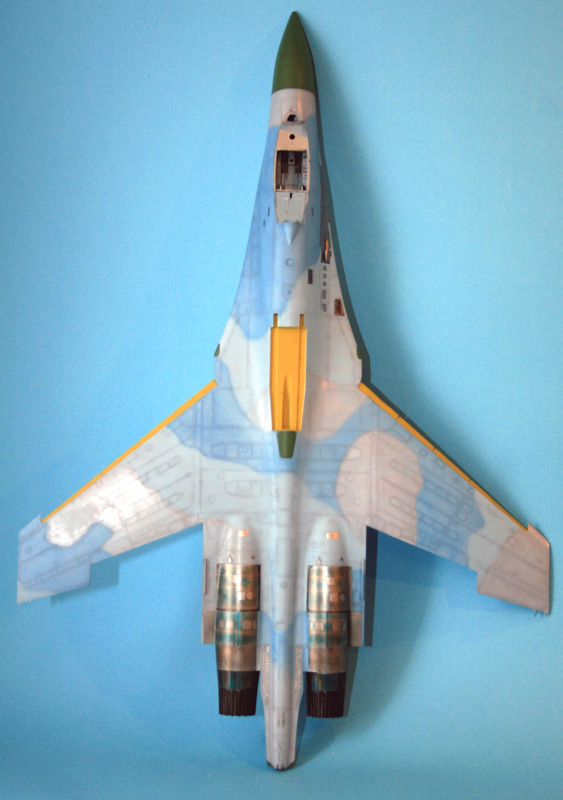
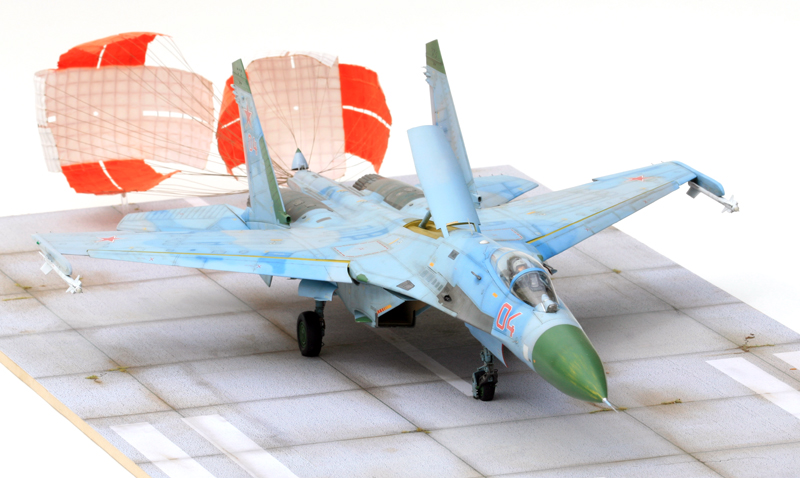
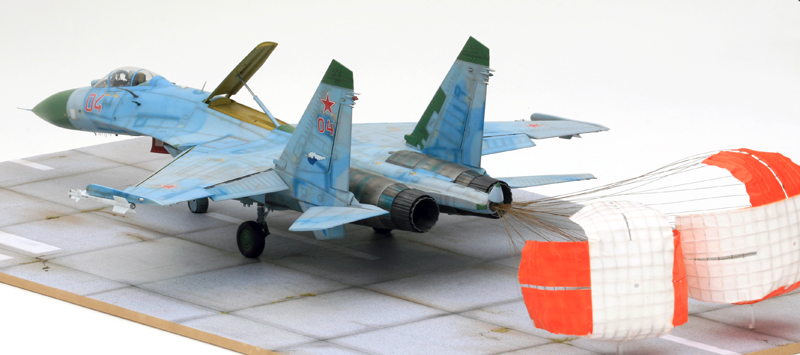
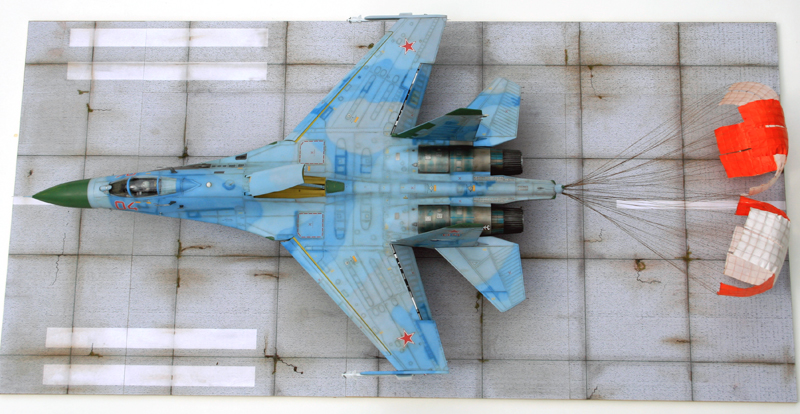
The idea is to display that huge bird braking on the runway on the landing roll.
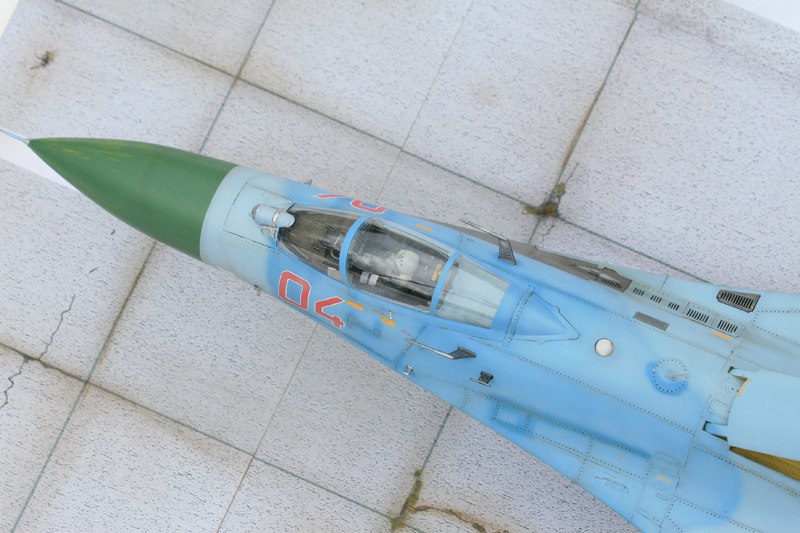
Airbrake will be popped out, nose wheel compressed, pilot at the controls and canopy closed of course.
The big challenge of this build will not be the aircraft itself but the brake chutes I intend to deploy… I don’t know at what stage yet 🙂
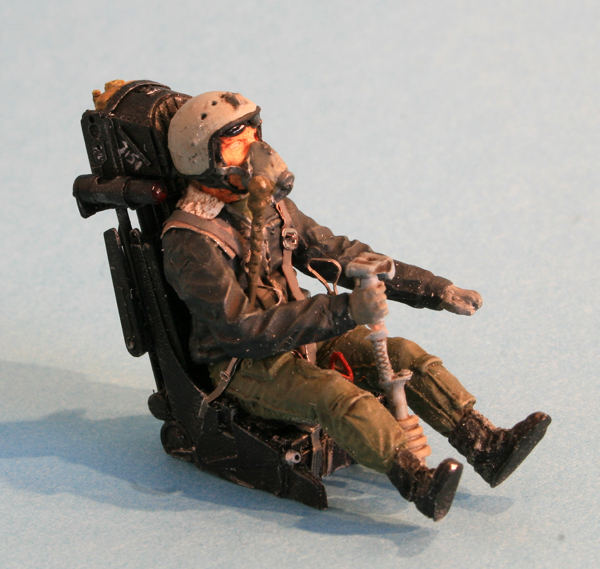
I’m just out of a few days fighting hard to make two 1/32 resin figure fit in a Skyhawk cockpit, and I was ready to start back with this one. But nada, the mastercaster pilot fits in the Su27 cockpit like a glove. Even the feet nicely rests on the rudder. Very well done MasterCaster, that figure is great.
I debated using the kit seats or the quickboost and finally chosed to scrape the belts from the resin seat and use that one. the figure fits both the same way.
Of course since a modeller can’t be totally satisfied, the pilot doesn’t have his hands on the control and that will need to be modified. I borrowed 2 arms from a US pilots to see if it would fit with minor surgery. that US pilot is huge so the arms are a bit long 🙂
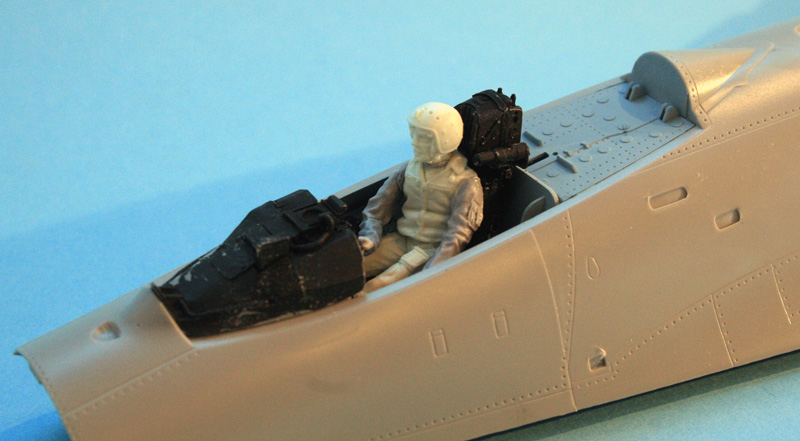
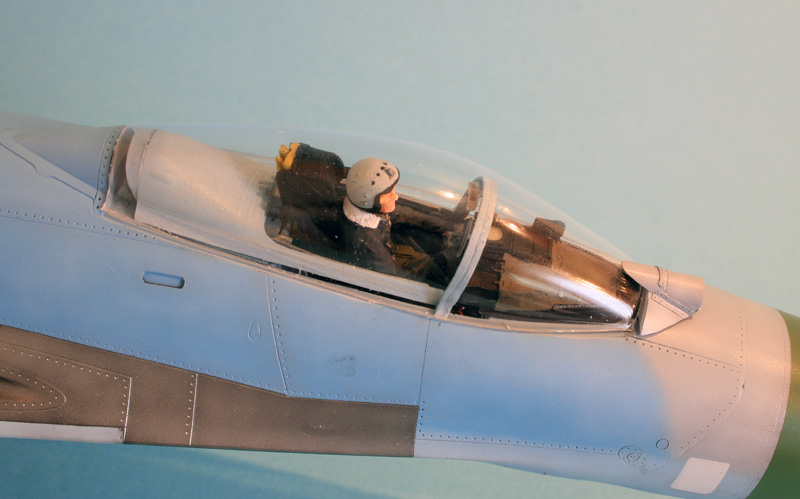
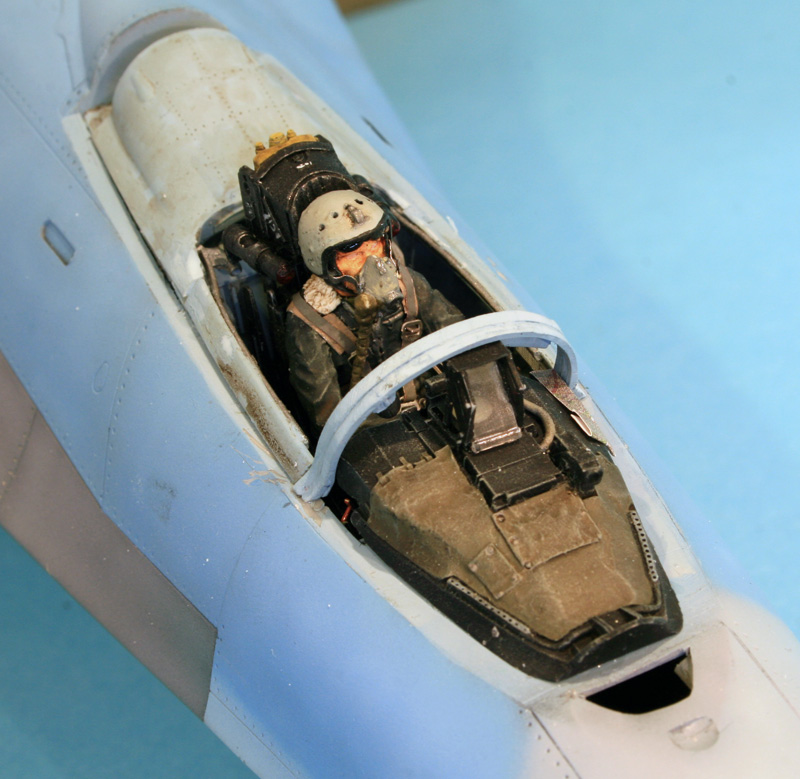
The next step was to try the seat &pilot into the canopy and up the fuselage
And then close the canopy to see if I have enough clearance…
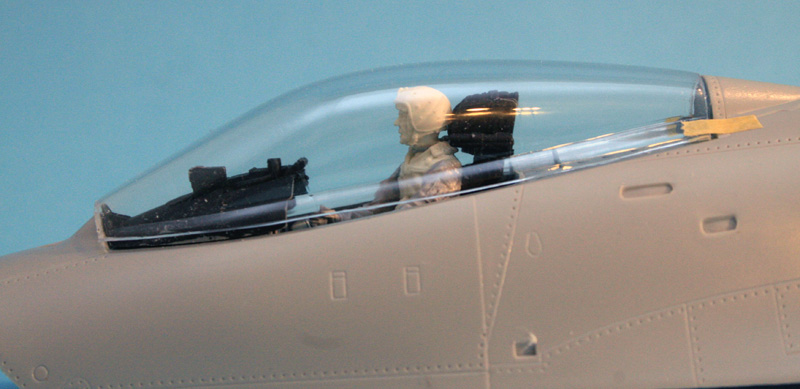
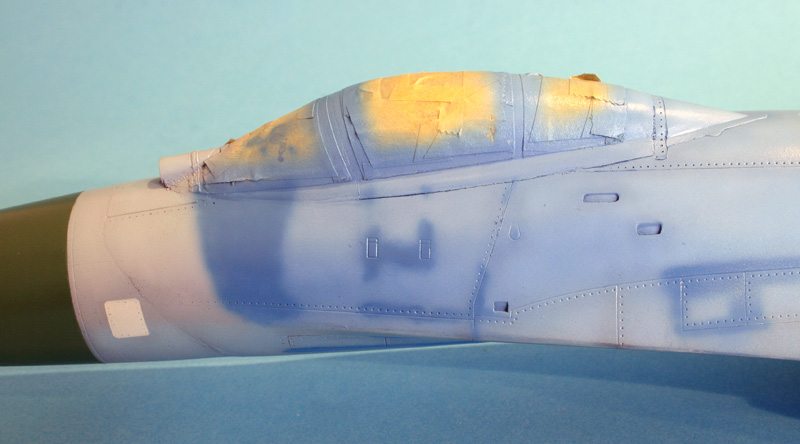
Yep, works ok. The IRST structure on the coaming prevent the canopy to close fully, that will be addressed later. The zacto vacu canopy was not so hard to cut to shape (always a stressfull moment) and it’s also a great fix for the kit.
First time I use prepainted cockpit. It’s quick and it’s nice 🙂
Cockpit colour is aeromaster 1101 french blue. It matches perfectly the eduard colours. too bad we can’t find that one anymore.
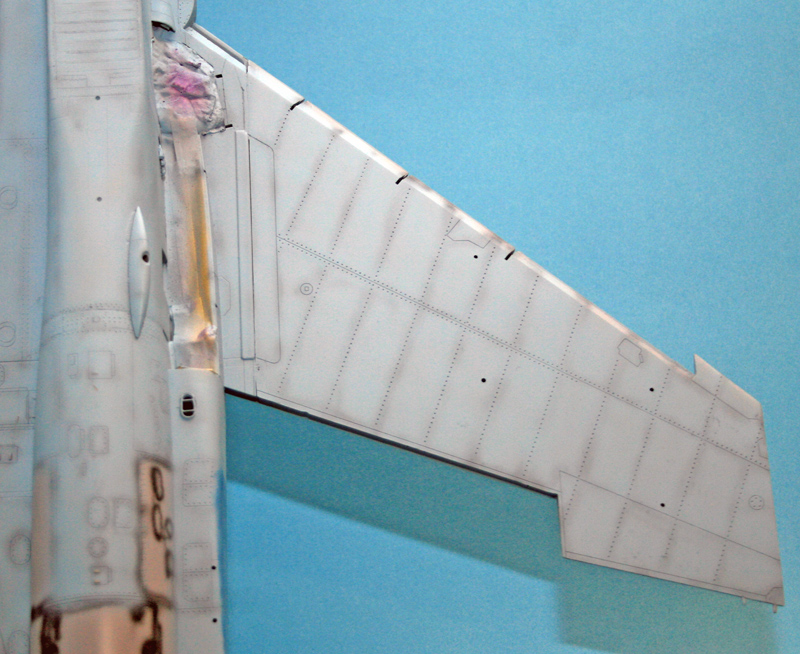
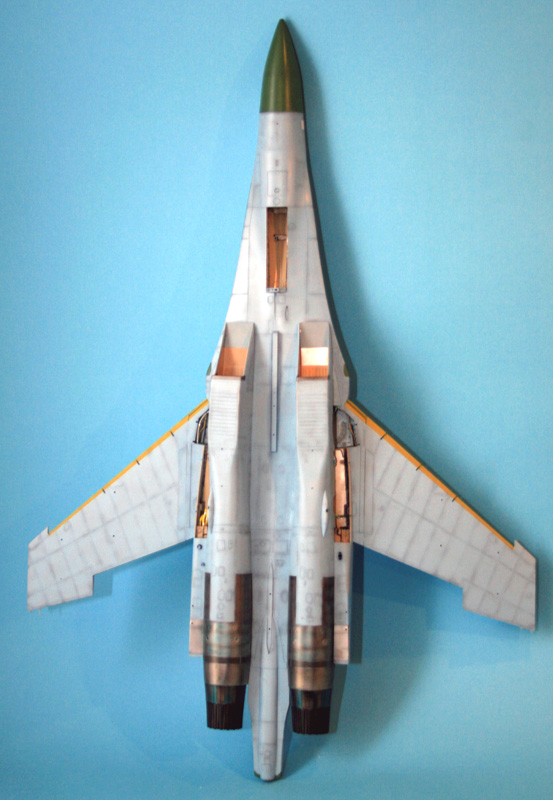
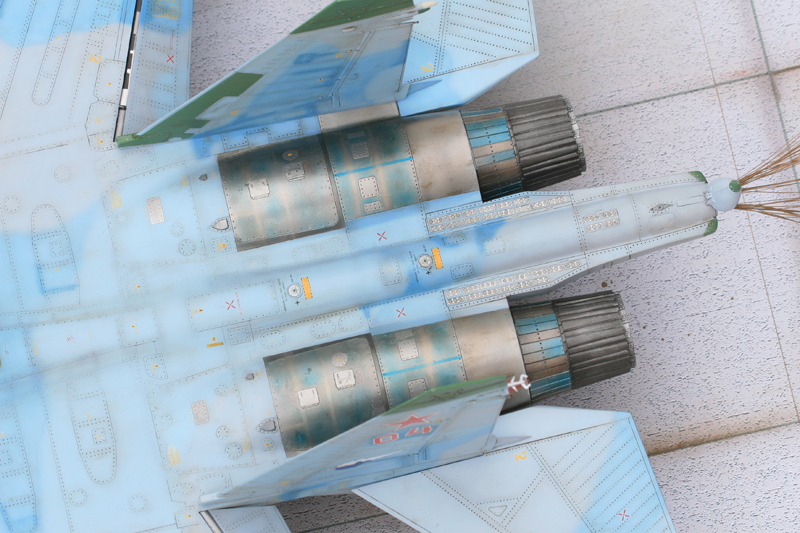
The assembly started with the intakes and they are a real pleasure to work with. the fit is perfect and the resin is very nice to work with. never had I the pleasure to work with such a nicely crfated and designed aftermarket product. I’ll raise the FOD guard so I don’t even need to sand the two halves of the intake trunk.
Painting was done with a beige colours inside, FOD guard are dark metal. and the lips are fuselage colours.
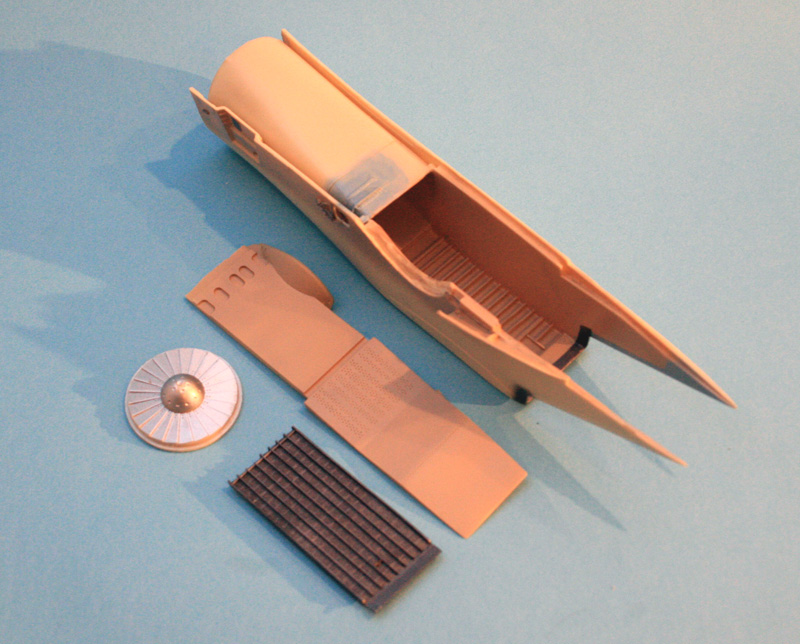
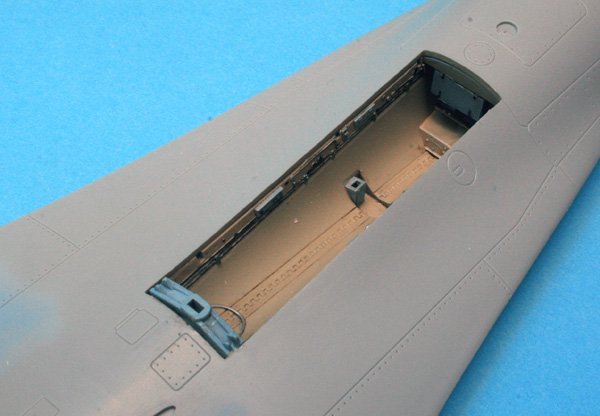
The level of details on those intakes are flabbergasting. I wouldn’t buy any flanker without them for sure. I won’t spend a lot of time into the wheel wells – I know they lack a lot of details and tubing but I’ll concentrate on what is really visible.
From analysing it’s a rather easy model to build. It doesn’t have many parts nor complicated assemblies. But it has some rather nasty traps.
Most of the time on this one is not spent on building but on the web looking for pictures and built reports to identify and see how to avoid them. I’ll get on this back later
In the meantime, minor detailling was done in the gear bay and the intakes were glued in place.
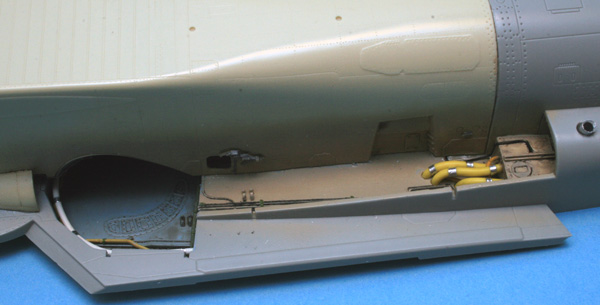
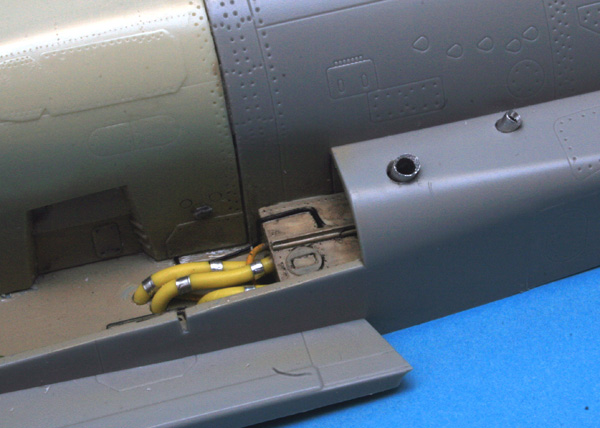
It’s nowhere close to what has been seen on some previous build and rather harsh, but enough for me there. Most of those aren’t visible anyway. I just added the rear box and fuel pipes (yellow)
Again, it’s really not laid out as it should be, the idea was just to populate the area with yellow pipes. I also added the two exhaust aft of the wheel bay. Easy enough to do.
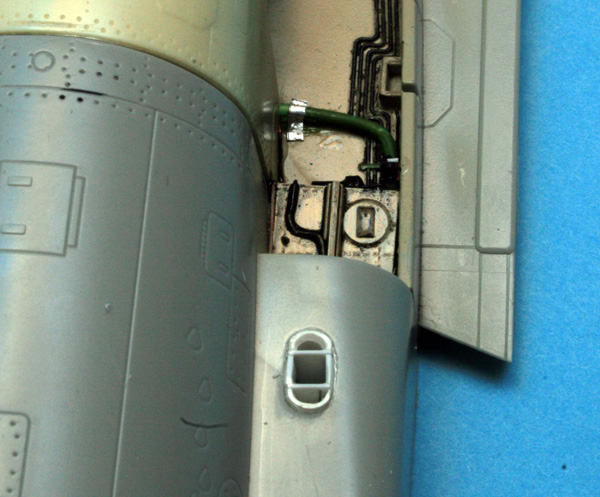
the other side doesn’t have the fuel pipes but some sort of pump and a few green pipes. Nothing fancy. Of course the real one has 4 parts, mine has 3. A bigger exhaust was also fitted aft of the wheelbay. The nose bay is from the box. I decided to paint the gear bay a mix of hemp and grey/blue. The contrast look nice and I saw that on many pictures.

The intakes tend to bent a bit the lower fuselage when they are glued on. Something that will need careful handling when the fuselage parts are glued together.
I almost blew it on the port intake because the end of the resin fan wasn’t sanded enough and prevented the intake to fit perfectly. My contact points between the lower fuselage and the front part of the intakes is also very small and that may cause problem later on in the build …
I’m about ready to close the fuselage together.
The first trap to avoid is gluing the wing on the bottom fuselage and relaise that you have a step between the wing and the top fuselage. Something very hard to fix. Many guys glue the wing to the upper fuselage before closing it and I must say I’ll do the same. Although Zactoman identified the problem and showed us where to sand the upper fuselage to avoid the issue.
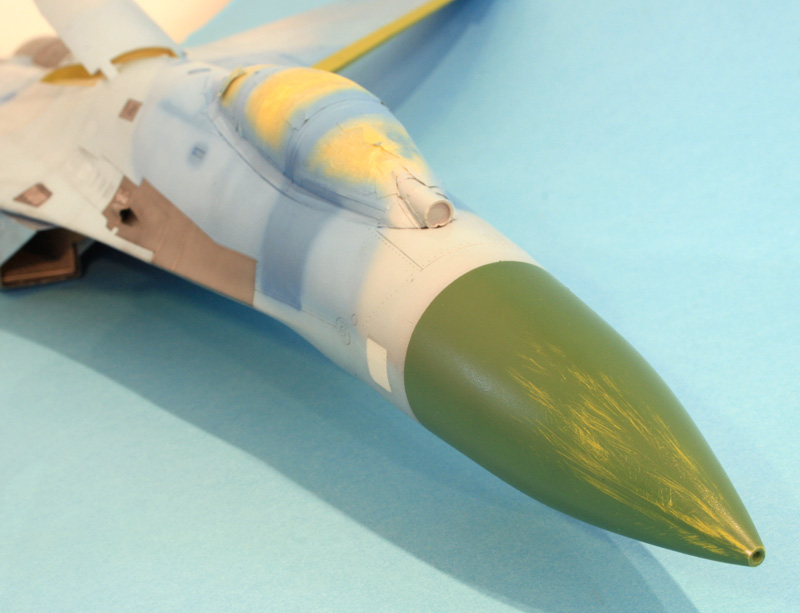
Second trap is to avoid screwing too hard to nose screw as this will distort the front fuselage and probably create problems fitting the nose cone.
Third trap here is to make sure to study the tailerons as their pivot point isn’t placed correctly and may need to be solved before closing the fuselage if you want to make it perfectly. I think that in my case I’ll simply replace the pivot point after. I won’t superdetail the area but I need to place them in the braking position, so I’ll have to change the pivot point anyway.
Another trap to avoid: Nose fitting:
Better follow Zactoman instruction and remove a bit of material before closing the fuselage …
The fit isn’t perfect on the sides and since the plastic is very thin around the nose, you run the risk of sanding through …
Apart from the nose, no big fitting issues and very few putty used.
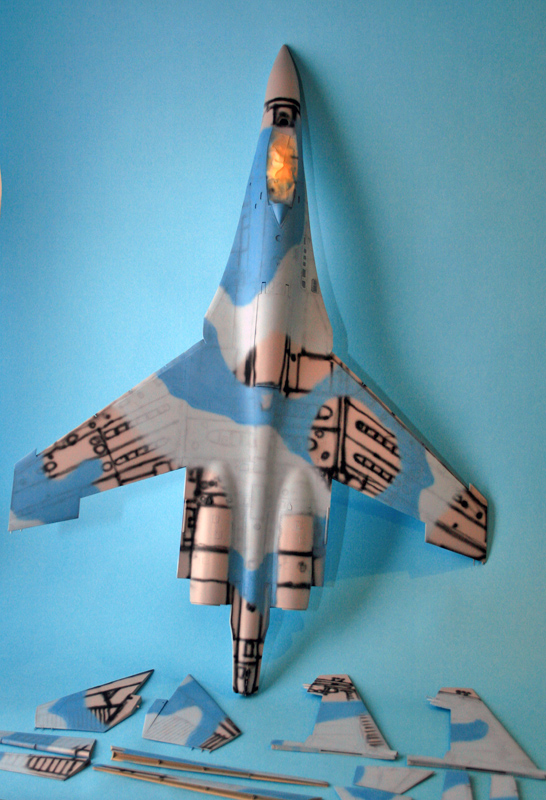
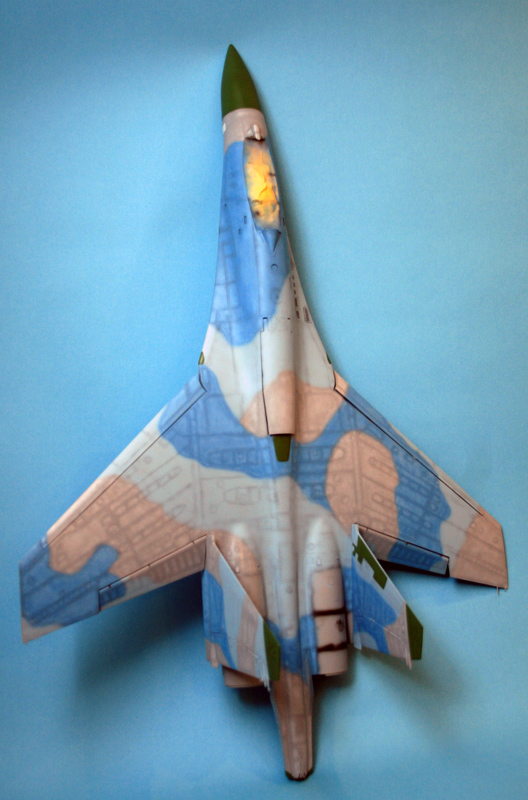
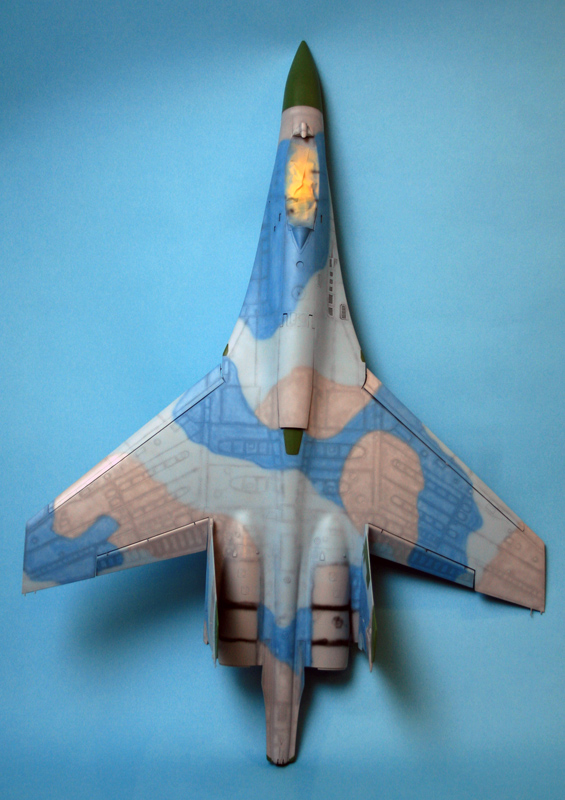
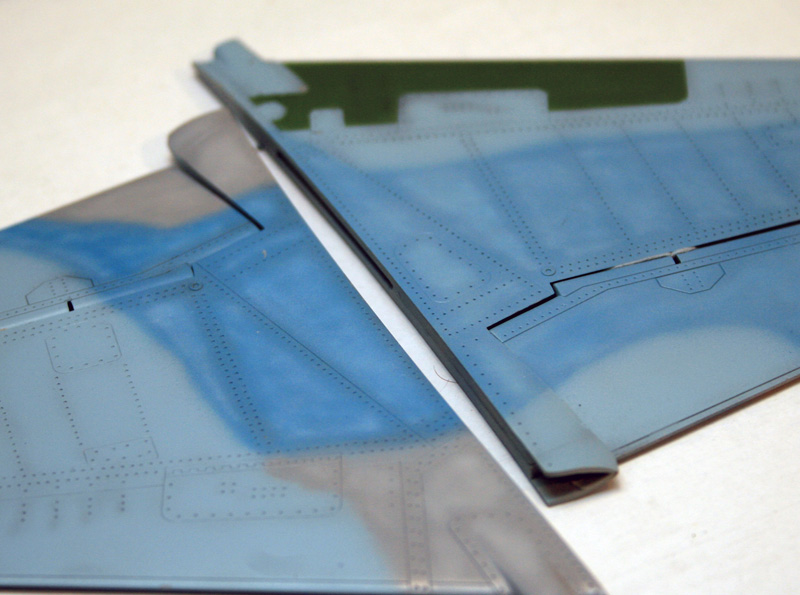
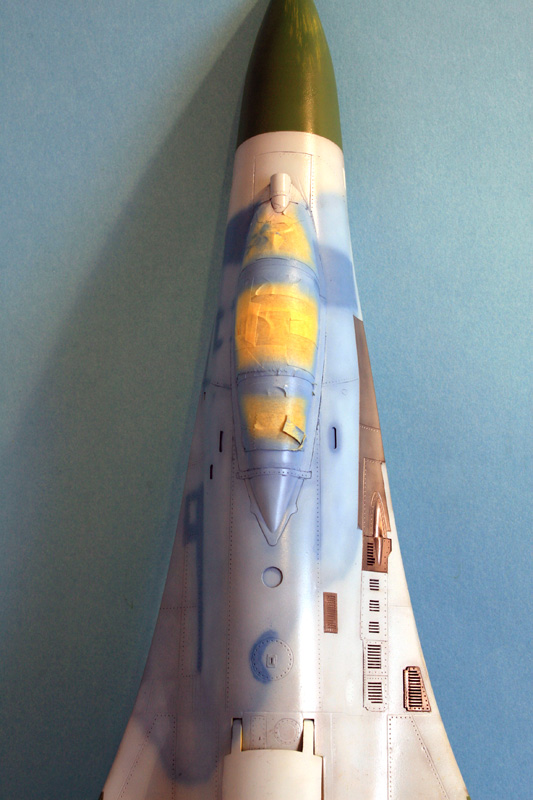
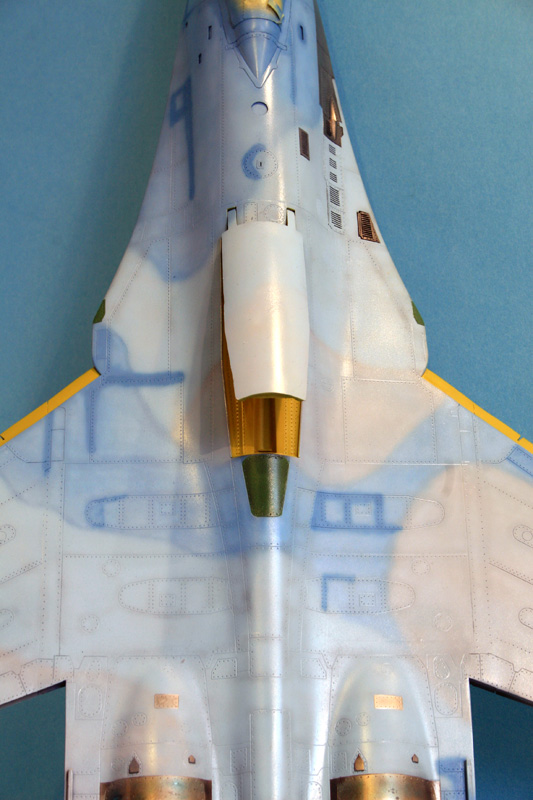
I finally decided to make my own mixing based on adversary blue colours.
Pale blue FS35526 = 1xH45 + 2xH308 + 5xH11
Blue FS35190 = 5xH11 + 1xH308 + 1xH322
Haven’t decided for the grey which should be something like H306, 307 or 308
at least for the grey and blue.
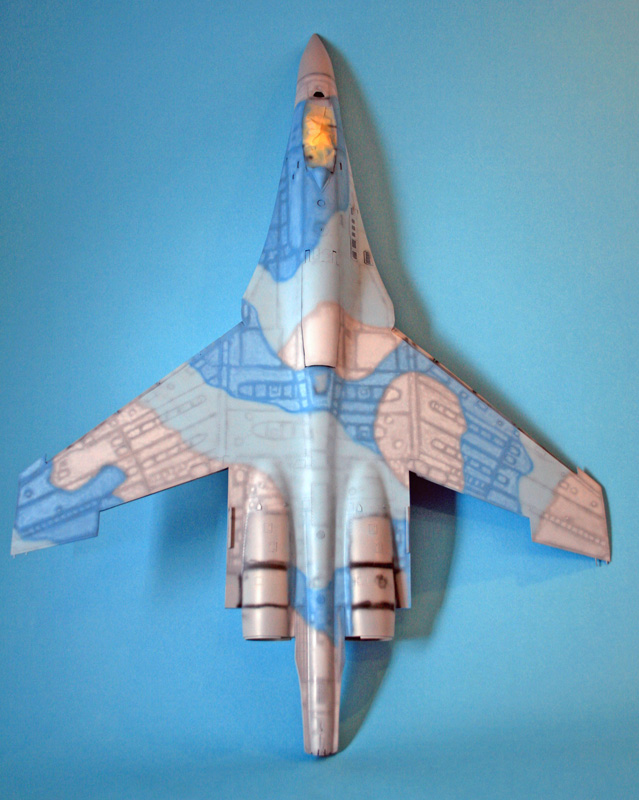
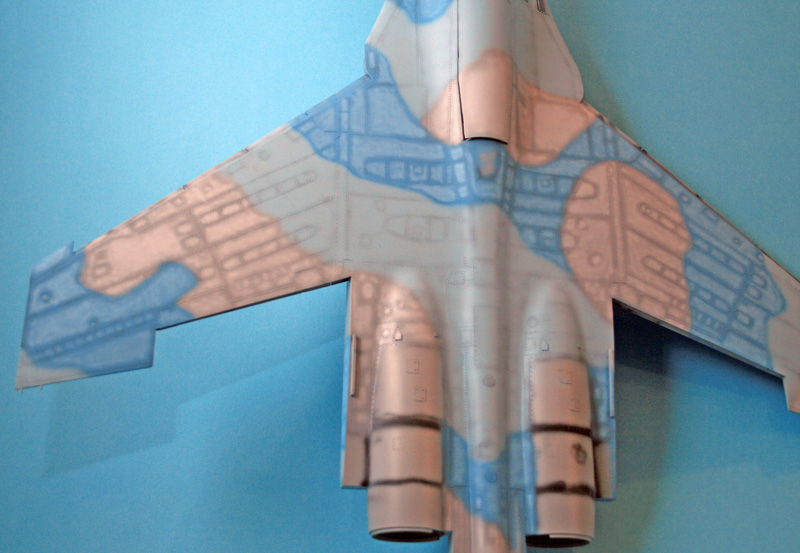
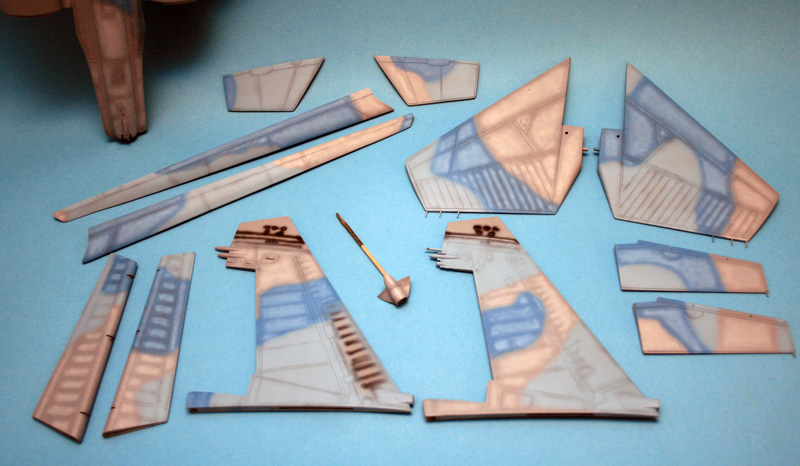
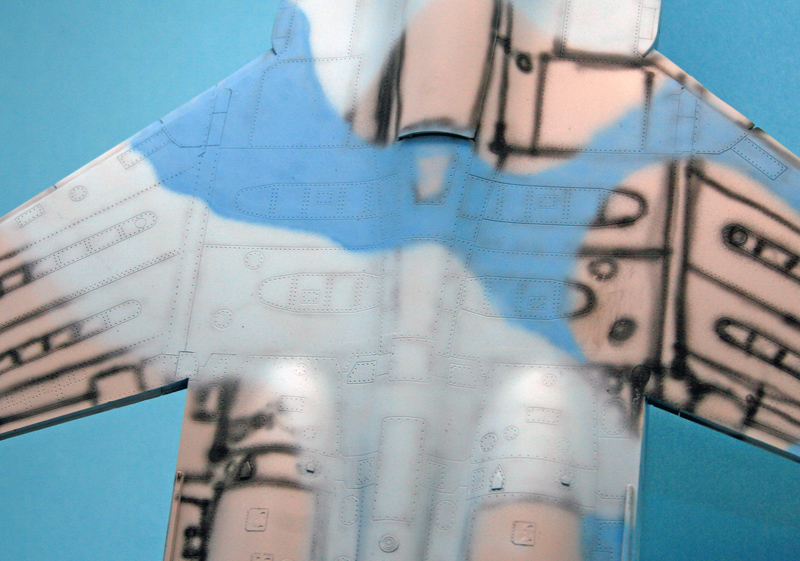
I’ll probably blend the colours together with a mist of pale blue now to give it less contrast – although the flash pictures give more contrast than there actually is on the real model.
the varnish and future weathering will blend the colours as well, but I’ll try the pale blue mist first and see how it goes:
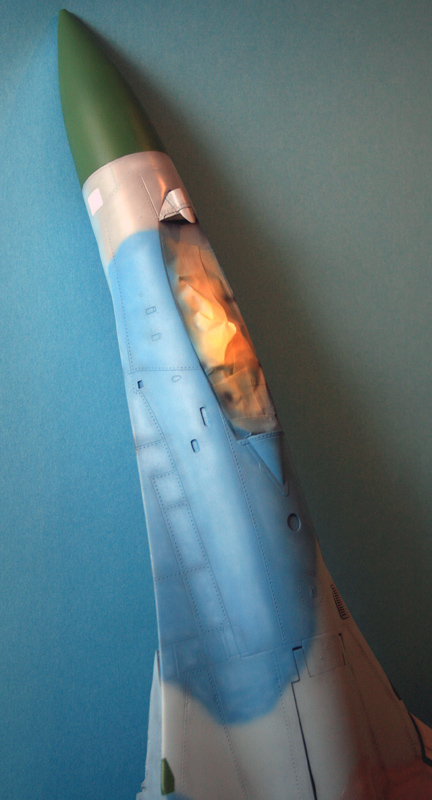
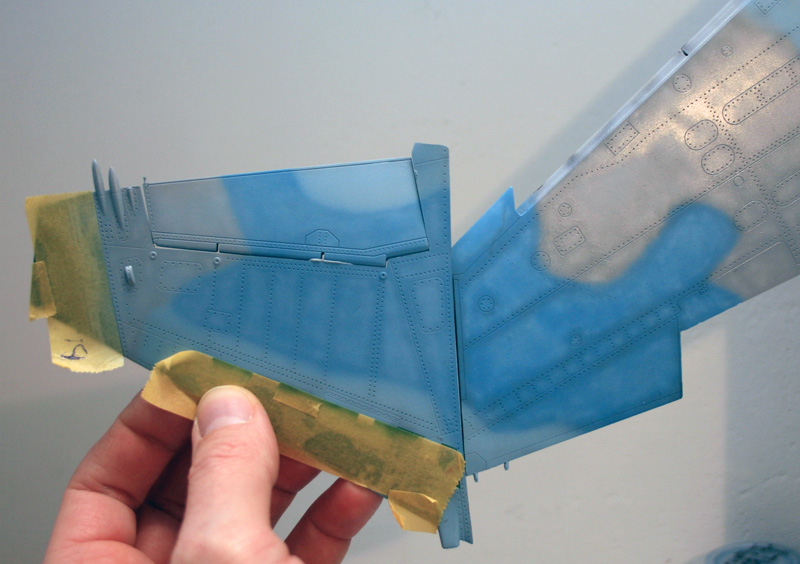
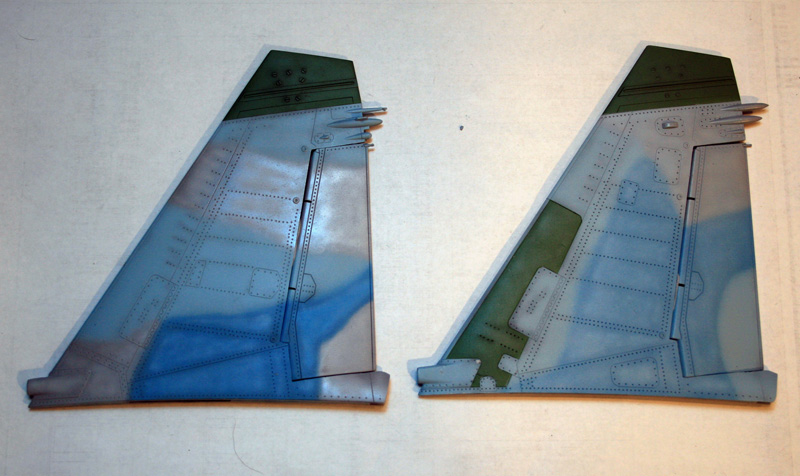
although i’ve got some nasty flash reflection in the greys… first time I use flash for those kind of pictures, sorry!
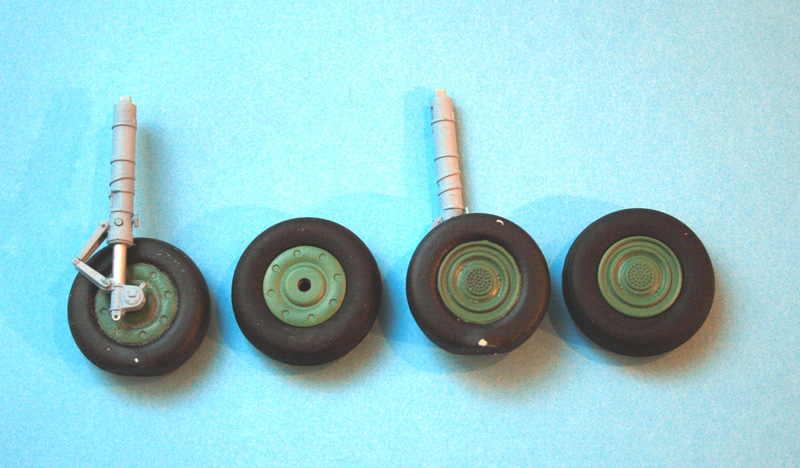
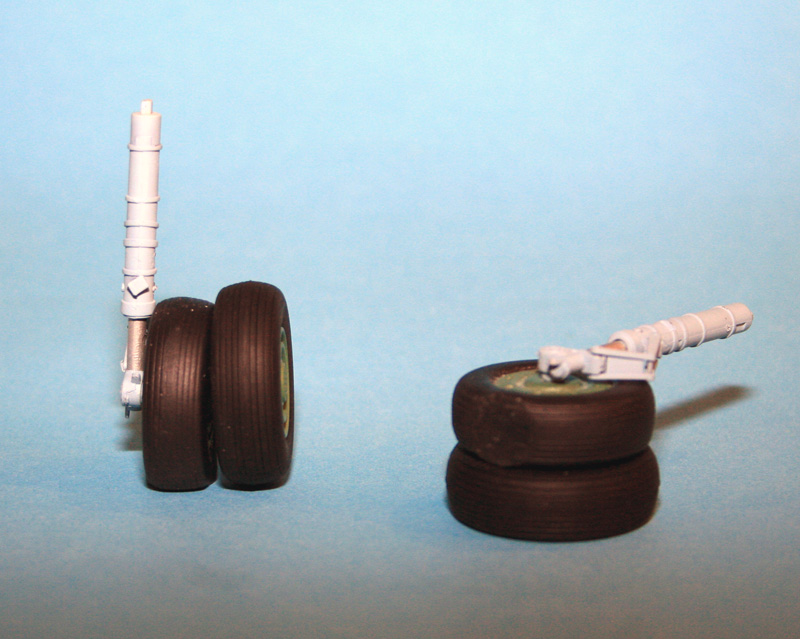
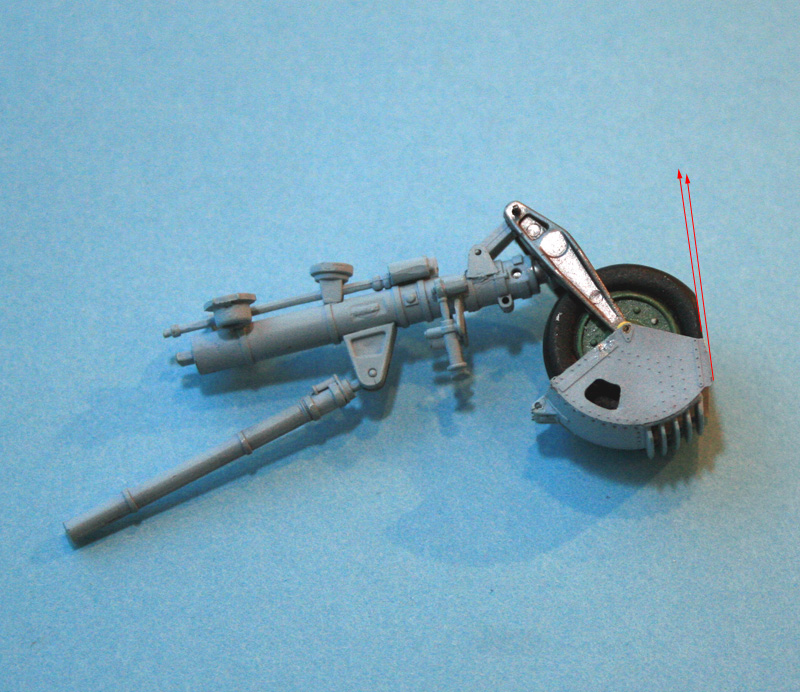
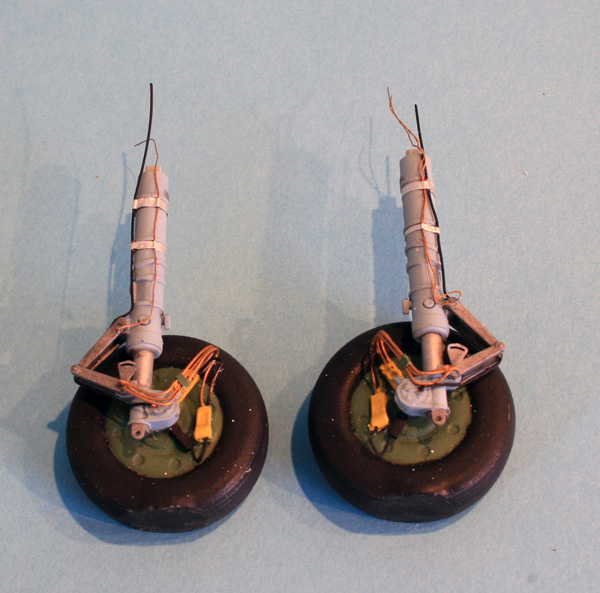
That’s for whatever compression of the nosestrut.
I’m doing a braking airplane, so the nosewheel strut will be compressed and thus I assembled the nosewheel without spring (but still moveable and reaching all position – I’ll glue it later on.)
The two remaining springs have been inserted into the main gear but it’s not a good idea in the end. The spring are too strong and don’t compress with the weight of the model, the consequence is that the model sits too high on its main wheel. I’ll remove the springs and I’d advise to get rid of them and glue the struts at the required level (and equal on both side).
I also elected to work with the palstic main gears as the Y supports are placed too high and need to be lowered on the legs. Easier done with the plastic than with the white metal.
Next step, detailling all those gears. They are way too crude!

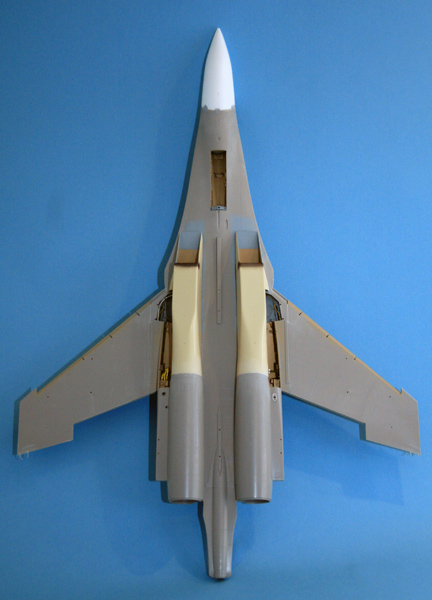
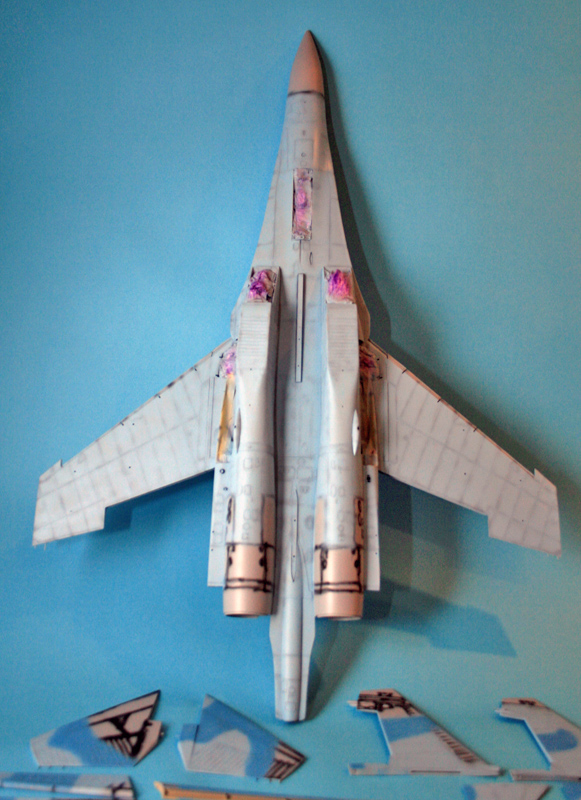
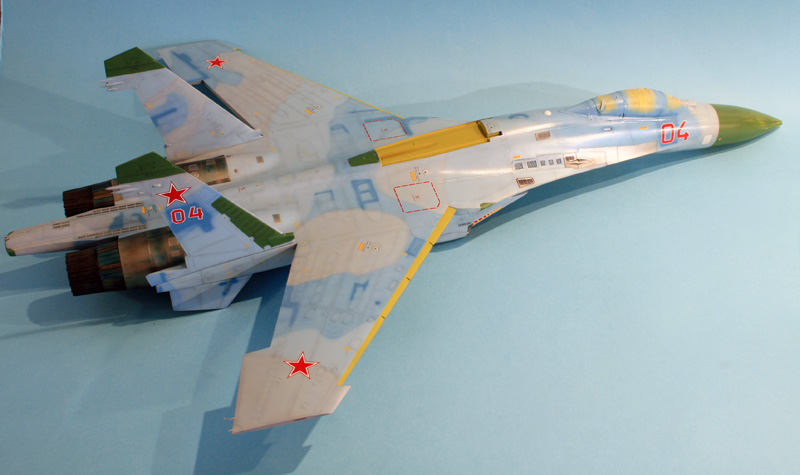
So first dryfit and see all the different component behave together, we have eduard, Trumpeter, Zactomodels, Mastercasters and Quickboost parts in there!
The forward looking tiny camera on quickboost glareshield was lowered as it sits a bit high for the vac canopy.
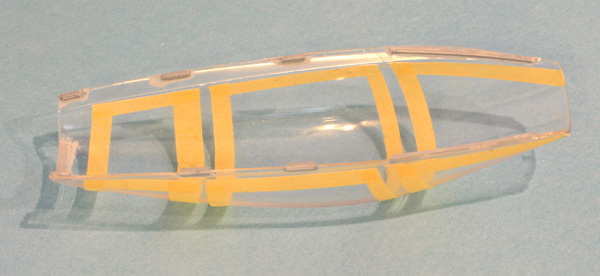
As you can see, I glued the vertical canopy frames on the fuselage, this is actually the best guide for the vac canopy.
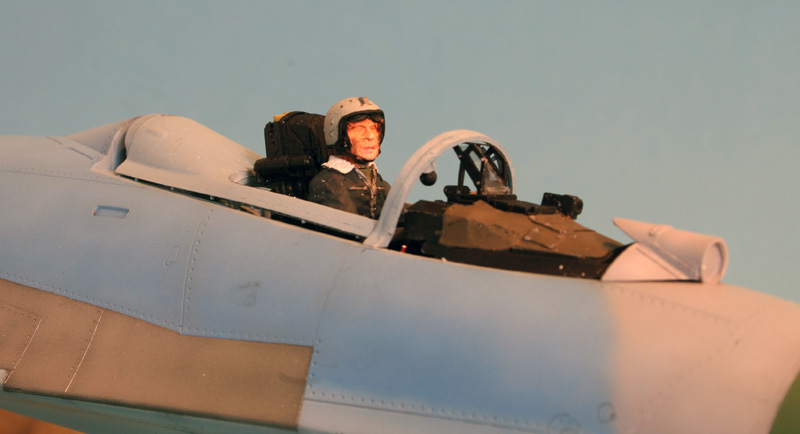

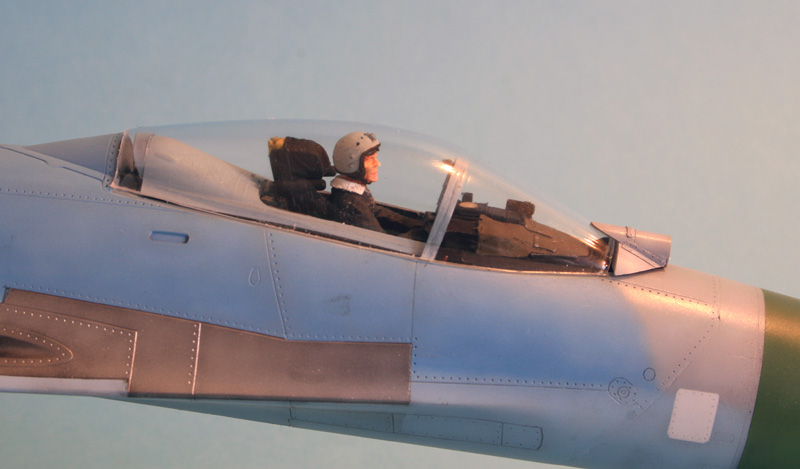
Piotr is strapped in and ready to go in the cockpit, some minor stuff to finish but he’s basically ready.
Fitting the zacto canopy in a closed position. the cockpit frames are not wide enough and that creates a step between the canopy and the fuselage. This was overcome by placing some guides on the inside of the canopy and although all was successful when dryfitting, it went bad when gluing. I had to spend a full week end sanding and filling the canopy. Unfortunately, the vacuformed plastic doesn’t sand very well. And care must be taken not to slip into the clear parts … This will be a big surprise when I remove the masks.

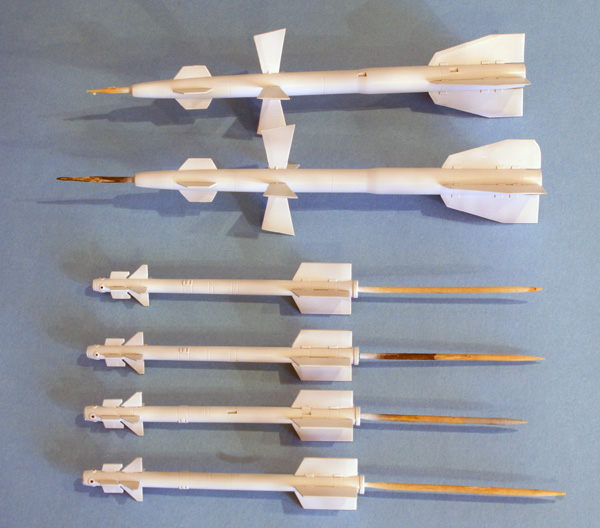
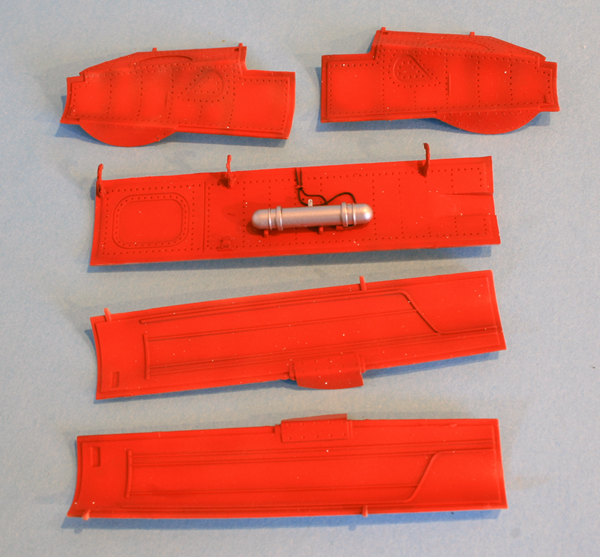
And finally some AA weapon candidates. Those are straight from the box, not sure if I’ll use them or not…. ? We seem them very often without any AA weapons, but that’s a bit naked isn’t it …
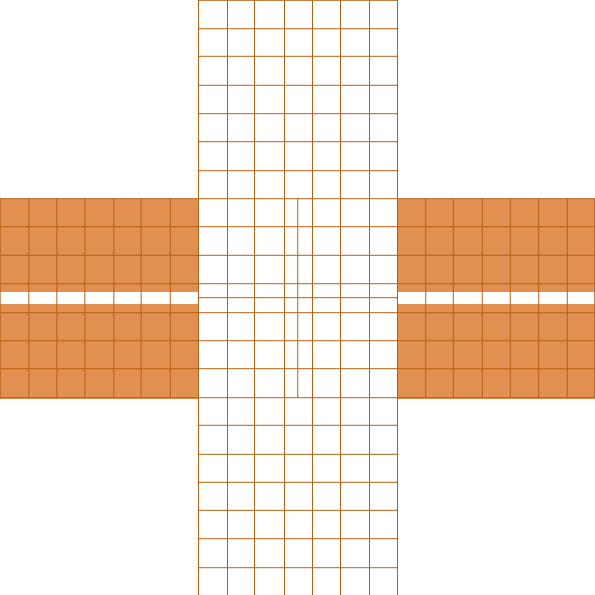
Each square is subdivised in squares of about 32cm, delimited by the parachute lines crisscrossing.
The center square has two extra lines in the center and the outer squares are cut in their longitundinal axis, but the lines remain there …

I consider the guys I quoted above master in their branch and I’m grateful they document their work so that guys like me can steal their ideas and have the same kind of fun. many thanks gents !!

What color have you used inside the gear bays?
LikeLike
masterpiece
LikeLike
LE FELICITO SEÑOR POR SU TRABAJO … YO ESTOY TRABAJANDO EN FRENADO DEL MIG-29 1/72 NO SE QUE TIPO DE TELA O PLASTICO QUE UD UTILIZO PARA EL PARACAIDAS YO QUISIERA MOSTRARLE MI TRABAJO Y CLARO TRATO DE MEJORARLO
LikeLike