If you purchase an independently reviewed product or service through a link on our website, we may receive an affiliate commission.
Sugar wax is an all-natural wax that helps remove your hair. Unlike other types of wax, sugar wax can actually be made in the comfort of your own home with natural ingredients, saving you the money and time that you would have spent at the salon. There are many different benefits to using this specific wax and we have got you covered on everything you need to know from how it’s made to how to use it, below.
What is Sugar Wax?
Sugar wax is a form of hair removal, mostly used in Egypt, believe it or not, and because it contains natural ingredients, it’s a great waxing alternative for people with sensitive skin. Sugar wax is less painful than regular wax as it pulls the hair from the root to the tip. However, it is recommended to use sugar wax if you have finer hair, as thicker hair tends to come out easier with regular wax.
Benefits of homemade Sugar Wax
There are many benefits to sugar wax – the first one being that it is made with natural ingredients so you know what you’re putting on your skin. The second benefit is that it’s great for sensitive skin because the ingredients will not irritate you. The third benefit is that sugar wax hurts less than regular wax as it completely pulls the hair out from the root. Even better, sugaring actually exfoliates your skin while removing hair, which other waxes do not do. So, after you use sugar wax, you will notice your hair feels much smoother.
Ingredients for making Sugar Wax
The ingredients for sugar wax cannot be simpler and you will be shocked when you find out what is in it. The only three ingredients you need are:
– 1 cup white sugar
– 1/4 cup lemon juice
– 1/4 cup warm water
Steps to making Sugar Wax
Once you have all your ingredients together, it’s time to get to work. Rachael Gallo, the Director of Spa Initiative at Exhale Spa, shared with Byrdie the exact steps to take which you can follow below:
1. “Place a medium-sized pot on the stove and add all ingredients to the pot.
2. “Bring the mixture to a boil over high heat, making sure to stir frequently to avoid burning.
3. “Once the mixture starts bubbling, reduce to medium heat and continue to stir frequently.
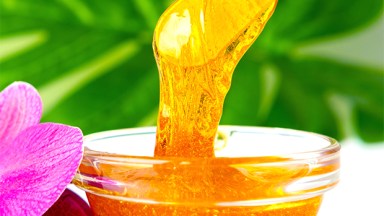
4. “Remove the pot from heat when the mixture turns golden brown. The consistency of your sugar paste should be similar to hot syrup. If it’s thick like honey, heat it a little longer.
5. “Transfer to a bowl and let the paste cool for 30 minutes. The wax should still be warm but easy to manipulate.”
How to use your homemade Sugar Wax
Just like with regular wax, preparing for sugar wax is similar. First, clean the area completely. Then, lightly sprinkle some powder over the desired area. Next, apply the wax to the area while it’s still warm. Once the wax is dry, simply peel it off in the same direction as hair growth using a quick motion. That is all you need. No wax strips, no cloth, just the wax. How amazing is that?
Post-Waxing & aftercare
Just like with any other wax, it is important to wear loose, breathable clothing after a wax so you do not irritate the skin. You can shower after but avoid sweating or workouts as the sweat can also be irritating. However, unlike typical waxes where you should avoid exfoliating when you’re done, sugar wax actually requires exfoliation after treatment, however, you must wait 24 hours before exfoliating. It is crucial to exfoliate the area you waxed after to prevent any ingrown hairs from forming.
If you don’t feel ready to make your own DIY sugar wax, have no fear because we rounded up two amazing waxes that you can try out before you start crafting your own formula. The VEET Sugar Wax Hair Remover is a great option that has over 50,000 positive reviews on Amazon. It’s made with 99% of natural ingredients and can be used all over your body. One happy customer gushed, “I got this for my lady parts because I have extremely sensitive skin when it comes to shaving and waxing, especially if it’s frequently. Fierce ingrown hairs and razor burn. I tried a small spot first and didn’t have any side effects so I went for the whole shebang. Left it on for 9 minutes. Wiped off with a warm washcloth and boom, silky smooth everywhere! I would recommend layering it a little thick so it works best at getting all the hair. I had some sensitivity afterward for a few hours but went away quickly, and it was nothing compared to what I was experiencing after shaving. Seriously, I’ve tried everything and this is BY FAR the best!”
Another great option is Nad’s Sugar Wax Kit with over 2,000 reviews. This waxing kit requires no heat and comes with reusable cotton strips if you’re more comfortable using those. It’s 100% natural and it even comes with an argan oil soap to wash your body with after waxing to prevent irritation. A very satisfied customer raved, “It’s really easy to use, gets the hair off great, and is super easy to clean up! It’s so much better than strip wax that always sticks to my skin and doesn’t work. It’s so much easier than regular wax to clean up, because it just dissolves in water. I just clean the strips by running them under hot water. They don’t even need soap. I have to stick it in the microwave for a few seconds (not too long or it will need to cool before using it) to make sure it’s runny enough to be easy to spread.”