The Copelandia magic mushroom grow kit is perhaps the strongest magic mushroom grow kit you can grow at home. With a complete magic mushroom grow kit and maybe a thermos mat you have everything you need to grow these beautiful white magic mushrooms yourself. But these sensitive and powerful blue meanies have a longer user manual than the common cubensis strains. For this report we have called in the help of Dennis Dam, a magic mushroom grower with a lot of experience. What can we learn from him?
Summary of this Grow Report
|
Type of Magic Mushroom |
Hawaiian / Copelandia, also called "Blue Meanies" (Panaeolus cyanescens) |
|
Content Grow kit |
1200 cc |
|
Total Yield |
76,2 grams of fresh magic mushrooms (enough for 3 heroic doses and 15 micro doses) |
|
Yield first flush |
31,3 grams |
|
Yield second flush |
44.9 grams |
|
Duration until first harvest |
14 days |
|
Total duration 2 runs |
19 days |
Buy your magic mushroom Grow Kit here!
Does this grow report seem too difficult? Check out our McKennaii or Golden Teacher grow reports. They are a little easier.
Copelandia Magic Mushrooms
Our Copelandias are special and very strong magic mushrooms that require a different kind of care than the cubensis collection. This is because they are not part of the same magic mushroom family as McKennaii's, Mexicana's or Golden Teachers. They are meant for the more experienced magic mushroom growers who want to try something new. We want to introduce you to a very experienced grower: Dennis Dam. Dutch-Headshop received a nice step-by-step grow report and detailed pictures of the entire grow process.
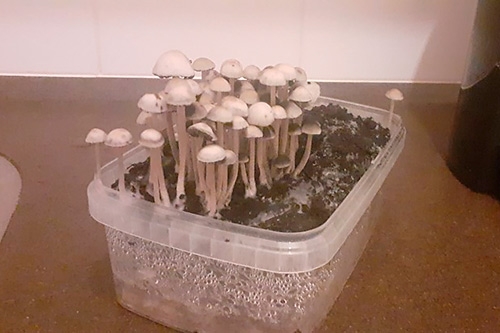
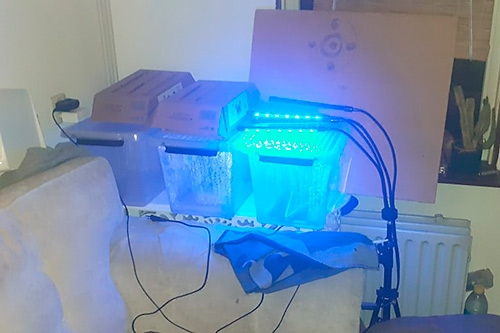
You can simply grow the Copelandia magic mushrooms in the bag provided following the instructions we wrote in the detailed product description of the Copelandia grow set. For his own research, Dennis removed the kit from the bag and placed it in a large sealed plastic container. This way, conditions such as humidity, temperature and even the composition of the air can be measured easily. That is why you will see some additional equipment in addition to a large container in the photos. The temperature is continuously maintained using an infrared heat mat with some spacers between the mat and the tank. You can use tip sheets for this purpose, for example. The humidity is increased considerably by spraying the entire inside of the container with water (not on the kit when the mushrooms come up). You can do this yourself by spraying the inside of the supplied bag. But be careful with spraying. Once there is mold and mushrooms on the soil, you should not spray on the kit itself. Only on the inside of the bag.
Where do these magic mushrooms come from?
Copelandia or Hawaiian mushrooms have been grown and selected over time so that they can also be grown at home. Before that, they were only found in the wild. However, their origin is not entirely clear. What we do know is that they are more concentrated and you can harvest them in a shorter period of time. Hawaiian magic mushrooms are more sensitive to contamination than cubensis magic mushrooms. This means that you have to be very careful with the preparation and intermediate care. Another difference with the is that you cover this mushroom grow kit with sterile soil. Fortunately, the soil is also included. Everything is there to get you started. But if you grow these mushrooms in the winter, we recommend you to buy a nice heat mat. They like a nice warm temperature. Let's see how Dennis proceeded!
Grow Parameters Copelandia Magic Mushrooms
After starting up the kit, before pin formation:
- Temperature: 26 to 29 °C.
- Spray water on the inside of the bag. Rel. humidity 90-95%.
- Keep bag closed.
- Leave in the dark.
Once pins emerge:
- Temperature: 24 to 28 °C.
- Renew air continuously (leave bag open, but safe from contamination).
- Spray water inside the bag on the inside of the bag, but definitely not on the kit itself. This will destroy the mushrooms. Rel. humidity 85-92%.
- Put them in the light (soft diffused daylight; not in the full sun).
Grow Report Copelandia Magic Mushrooms
Day 1: The Preparation
Because these magic mushrooms are very different from cubensis mushrooms, watering them is different than you may be used to. Follow these directions exactly.
Boil water or fill a kettle. You will need about 2 liters of water to start. After boiling, let the water cool down to room temperature before proceeding.
Work in a clean environment. So in the meantime, clean the countertop in a sterile manner with bleach, methylated spirits, or disinfectant (make sure to ventilate). Now wash your hands and lower arms thoroughly and rinse the outside of the grow kit with the boiled and cooled water. If you have isopropyl alcohol, you can use that to sanitize the outside of the kit, your hands and the bag on the outside.
Open the kit and be very careful not to breathe out in the direction of the grow kit. You might still have a mouth mask lying around. Use that.
Next, open the containers with soil. Pour the soil evenly over the grow kit. Copelandia magic mushrooms will not grow without adding a covering of this soil.
Pour the sterilized water into a plant sprayer and open the provided bag. Spray the inside of the bag so that the sides are well wetted.
Spray a little water on the soil of the mushroom grow kit, but do not get it soaking wet. Carefully place the container in the moist bag.
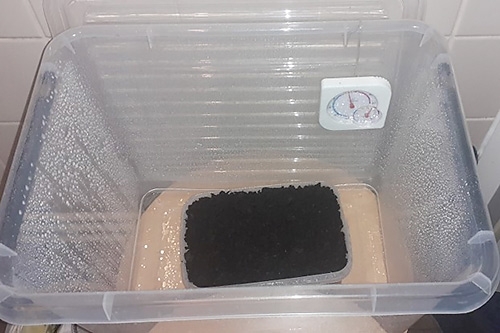
Dennis uses this grow box instead of the bag that comes with the grow kit. Everything you see or read here about the large container, you can also apply to the bag supplied.
Wave the bag open and closed several times for extra fresh air and close the bag with the paper clips provided. Place the bag with the grow kit inside in a dark place or in the shade. Definitely not in the sun.
If you have an infrared heat mat (highly recommended), place the bag on it. Do use a few spacers. We use tip books to keep a little space between the bag and the heat mat. When the bag has a temperature of 27°C and the humidity inside the bag is over 85%, you're done with the preparation. By the way, the humidity increases by itself. Adjust the temperature by means of the power of the heating mat.
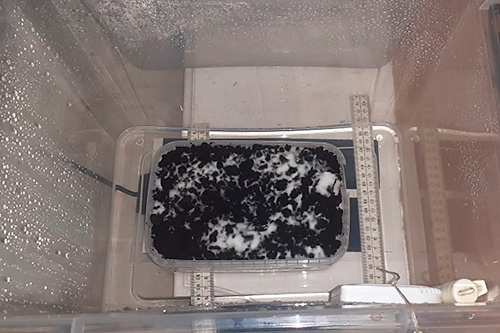
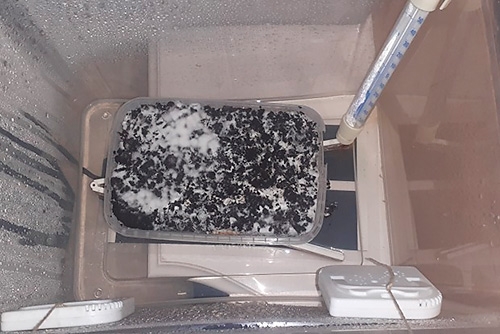
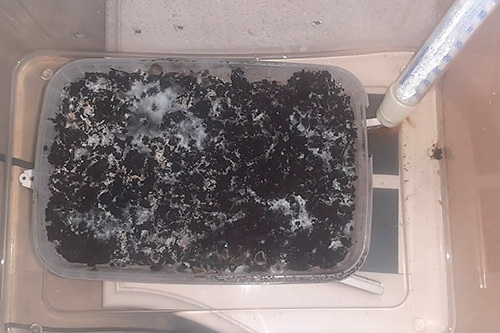
Day 4: The first signs of mycelial growth
The soil slowly begins to turn white. It starts with white dots here and there. Over time, the soil becomes whiter and whiter. That's what it's supposed to do. What you need to watch out for is that no green or gray mould develops. Green and gray indicate contamination. You probably didn't work in a clean environment during preparation. If you see these colors in the kit, we advise you to just continue growing.

Day 5
The soil is getting whiter and whiter. The temperature of the bag is now 28°C and the humidity 90%.

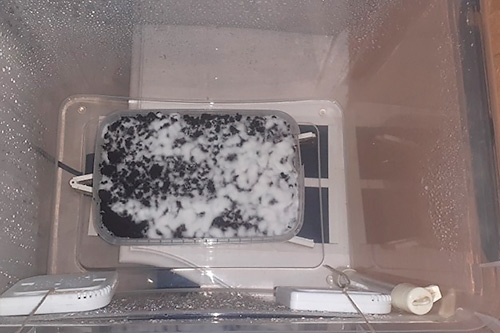
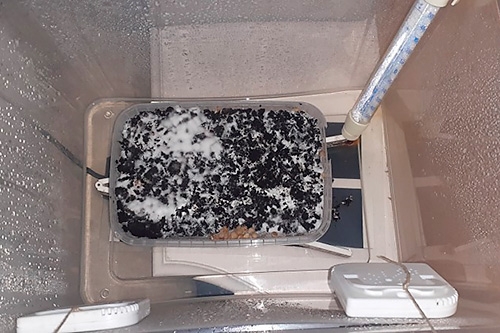
Day 6: Cotton mould
More white appears in the craters of the soil, but some cotton mold appears outside of them. That's another manifestation of the mushroom fungus that results from not enough moisture evaporating. That white fluff acts as an insulator, making the problem worse and giving infections a chance. The best thing you can do is increase evaporation. You do that by lowering the humidity in the bag. How? The easiest option is to open the supplied bag for a moment, at the risk of unwanted dirt swirling in. So be sure to do that in a very clean space and certainly don't exhale towards the bag. Here we didn't take the risk and left the large container closed to see if it would recover on its own. At the end of the report you can read some tips on cotton mould.
Day 9
It is 3 days later and we can still see beautiful white fungal patches in the craters. But there are no pins (young mushrooms) to be found yet. However, you can see below that the cotton mould is growing way too fast.
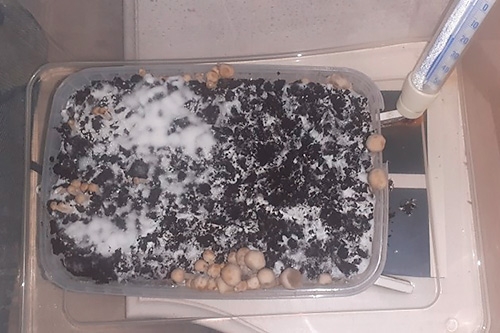
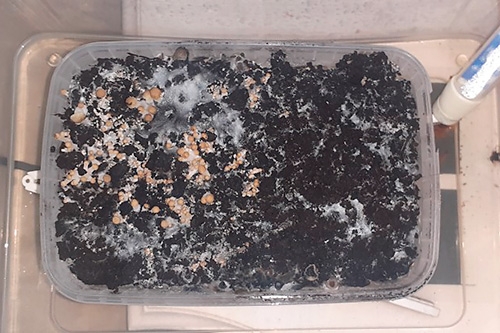
Day 10: Removing cotton mould
It is common to find pins as early as the tenth day. At the very bottom of the tray is a small cluster of mini mushrooms. This is because the moisture from the top of the kit is not evaporating well. Then the magic mushrooms look for another place to grow out. So it's time to get rid of the cotton mould just a bit.
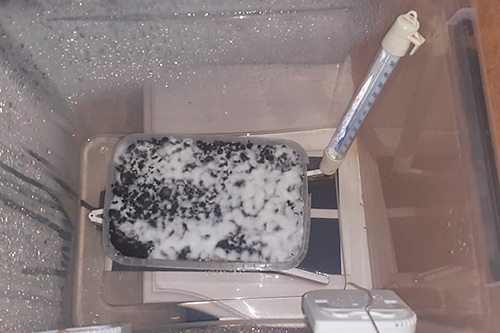
In the picture below you can see that the cotton mould has been scraped away to restore air to the soil. Also, the heat mat has been set a little lower. The temperature is now 25 to 26 °C. Furthermore, today the air has been refreshed every 2 hours by leaving the large container slightly cracked to increase the evaporation rate.
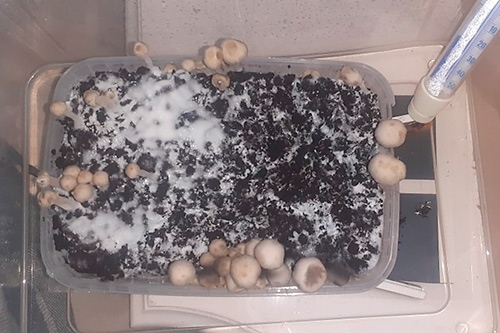
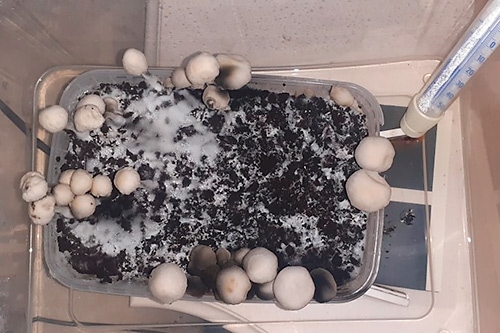
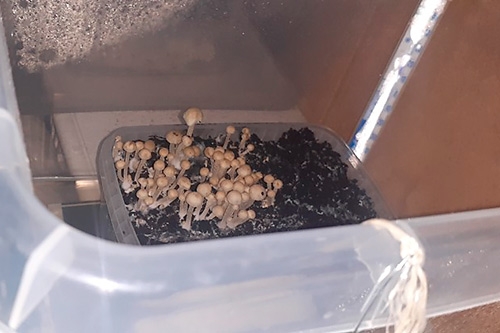
Day 11: Pin formation
Changing the air has paid off, because baby magic mushrooms are showing up on the soil. Mostly around the craters in the soil, but not yet where the cotton mould used to be. This is also the moment when the magic mushrooms can be put in the light. Diffused daylight with a blue tint works well. Think of a cloudy day.
Day 12
The temperature is now set at 28 °C. The magic mushrooms emerge from under the substrate or from the craters in the soil.
Day 13
The first magic mushrooms are now starting to grow and are slowly becoming lighter in color.
Day 14: Dark spots on Magic Mushrooms (spores)
Dark spots are now appearing on the magic mushrooms and on the mycelium covering the soil. No worries. Those are the first spores. According to the manual, we should now wait 24 to 36 hours before harvesting.
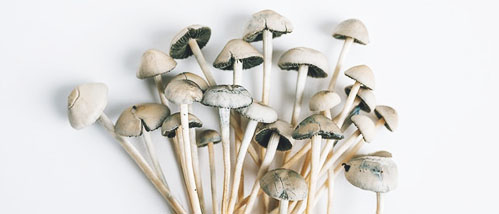
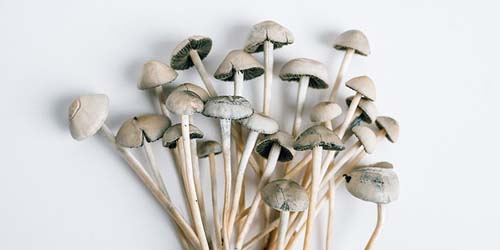
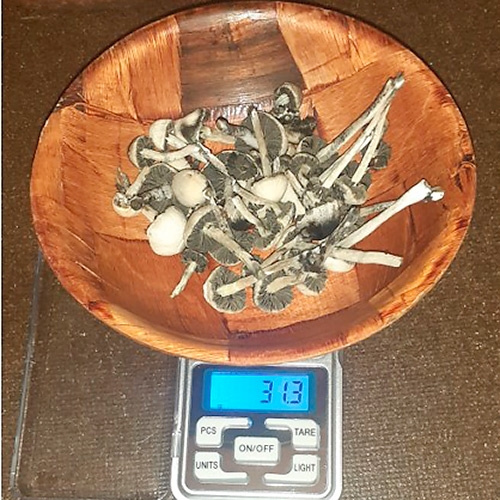
Day 15: The Harvest
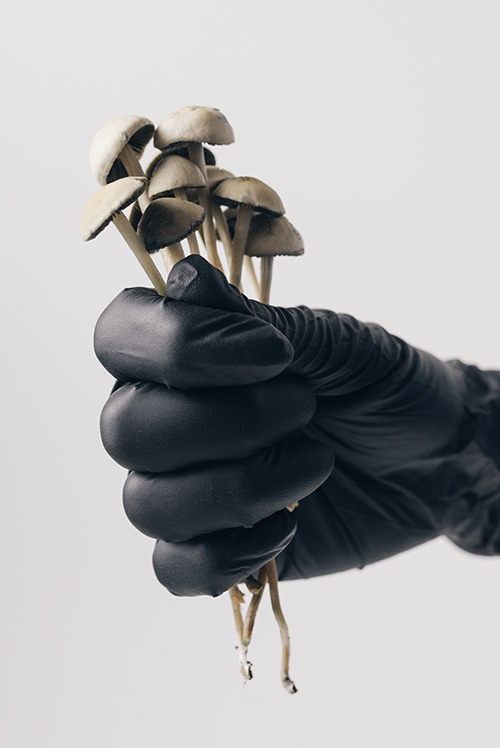
Approximately 50% have now released their spores and it is time to harvest. Remove all magic mushrooms by grabbing them with clean hands or sterile gloves at the base of the stalk and twisting them loose. Also harvest the small ones and malformed magic mushrooms. Unfortunately, no more mushrooms have emerged at the area where the cotton mould was removed, but perhaps they will in the next flush!

Preparing for Flush 2
Immediately after the harvest, you can run boiled (and then cooled) water into the kit. Preferably through the side of the grow box so you don't drench the soil. So don't pour directly over the kit. The idea is to leave 2 centimeters of water in the kit. Then you put the kit in the refrigerator for 3 hours. This will cause a cold shock, giving the kit the message to start reproducing again, and new magic mushrooms can grow. So another harvest from one container!
After 3 hours you take the kit out of the fridge and drain 1 cm of water. This means that there is still 1 cm of water in the magic mushroom grow kit. However, you can lightly spray the entire top of the kit again with boiled and then cooled water. Then you put the kit back in the supplied bag. With the heat mat back on full power, the temperature inside the kit will be about 28-29 °C, but that does depend on the surrounding temperature. You can leave the bag slightly cracked to increase the evaporation rate.
Grow Report Copelandia Magic Mushrooms Flush 2
Day 16: Pins are already appearing!
The Copelandia magic mushrooms are thriving during the second flush. If you look closely, you can already see new pins coming up 1 day after the harvest of the first flush. Again not on the side of the cotton mould we had before.
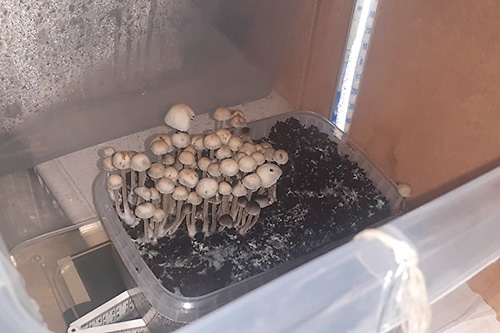
Day 17
They are already growing fast. On the entire left side is a cluster of magic mushrooms.
Day 18
The tiny magic mushrooms are already starting to grow larger and turn pale. A good sign.
Day 19
Especially the little magic mushrooms are starting to get black spots. That makes sense considering that their big brothers are dropping spores on the little ones. So these new black magic mushrooms are also not rotten and basically fine.
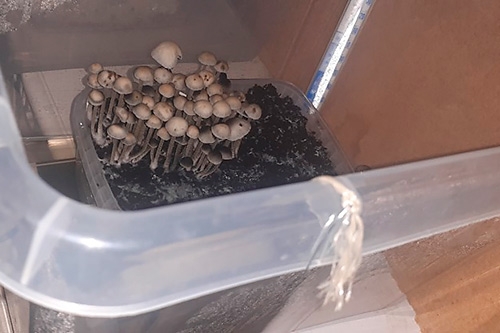
Day 20: Time for the second harvest
The magic mushrooms are ready for harvest. Again, it is 24-36 hours after the first spores have fallen on the smaller mushrooms and kit. Use the same twisting motion as during the first harvest to loosen the mushrooms.
Tips from a Pro
So much for Dennis Dam's grow report. Before we finish this article we would like to give you some tips on how to grow a Copelandia grow kit.
Copelandia Magic Mushrooms and Cotton Mould
Cotton mould can be unpleasant. To prevent problems, you should increase the temperature to 28-29 °C as soon as possible after start-up. If you see this fluffy white substance growing on the soil of your magic mushroom growing kit, you should increase your evaporation as soon as possible. Cotton mould is a sign that not enough moisture can evaporate. Besides, such an insulation layer only makes it more difficult. Because the temperature is quite high, you can drop the temperature by 5 degrees when cotton mould appears. Then the magic mushroom grow kit gets the signal from mother nature to go into mushroom making mode at full speed; similar to a sudden autumn. Make sure you ventilate to get the evaporation rate up. This helps tremendously for the formation of magic mushrooms. Finally, if there is already too much cotton mould in there, it is best to remove it neatly. Just don't scoop out any soil. So be careful.
Light
Dennis used a couple of blue LED strips instead of daylight to provide light for the magic mushrooms. The light was on for 12 hours a day and off for 12 hours a day. That way you can also grow mushrooms in a dark shed.
Humidity
If you leave the bag closed, the humidity creeps up to about 95%. This is perfect for the formation of pins, but once they are ready to turn into mushrooms, it is recommended to change the air. You can leave the bag cracked open by creatively securing the top with the included paper clips. You can also choose to flap the bag open and close a bit if you are home a lot. Every 2 hours as long as you are awake is enough.
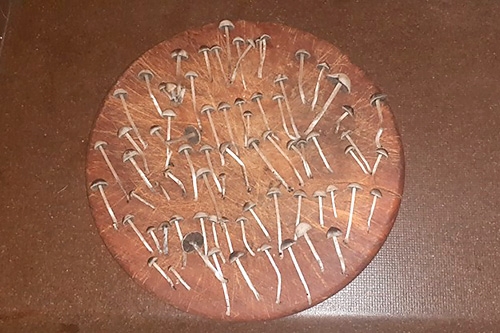
Magic Mushrooms harvested! What to do next?
There is a whole bunch of mushrooms to dry. What are the next steps?