This post may contain affiliate links. Please read my disclosure and privacy policy.

Instant Pot Chickpeas are a game-changer! You can cook them with or without soaking them ahead of time, with just the push of a button in your electric pressure cooker.
Why You’ll Love Them
They are easier to digest. Beans naturally contain raffinose family oligosaccharides, which are famous for causing flatulence in humans. (In other words, this is why beans cause gas.) Soaking the beans before pressure cooking may help to reduce those, making them easier to digest. (Though soaking is not required for cooking beans, if you don’t have the time!)
They are more nourishing. Pressure cooking is one of the best methods for reducing the anti-nutrients that are naturally found in dried beans, such as lectins and phytic acid. This increases the bio-availability of their nutrients, meaning your body should absorb them better.
They are hands-off. Instead of watching over a pot of boiling water on the stove, you can push a button and walk away! The Instant Pot will beep to let you know it’s done, and you can let the pot naturally release, if you get distracted.
They taste better than canned beans. Home cooked chickpeas have more flavor than the kind you’d buy in a can, and you can add any extra seasonings you love. Plus, you’ll avoid any potentially BPA-lined cans (or similar) in the process.
They’re filling. Chickpeas are a great source of fiber and plant-based protein. I love adding them to salads and stir-fries throughout the week, to sneak extra soluble fiber into my day.
Ingredients You’ll Need
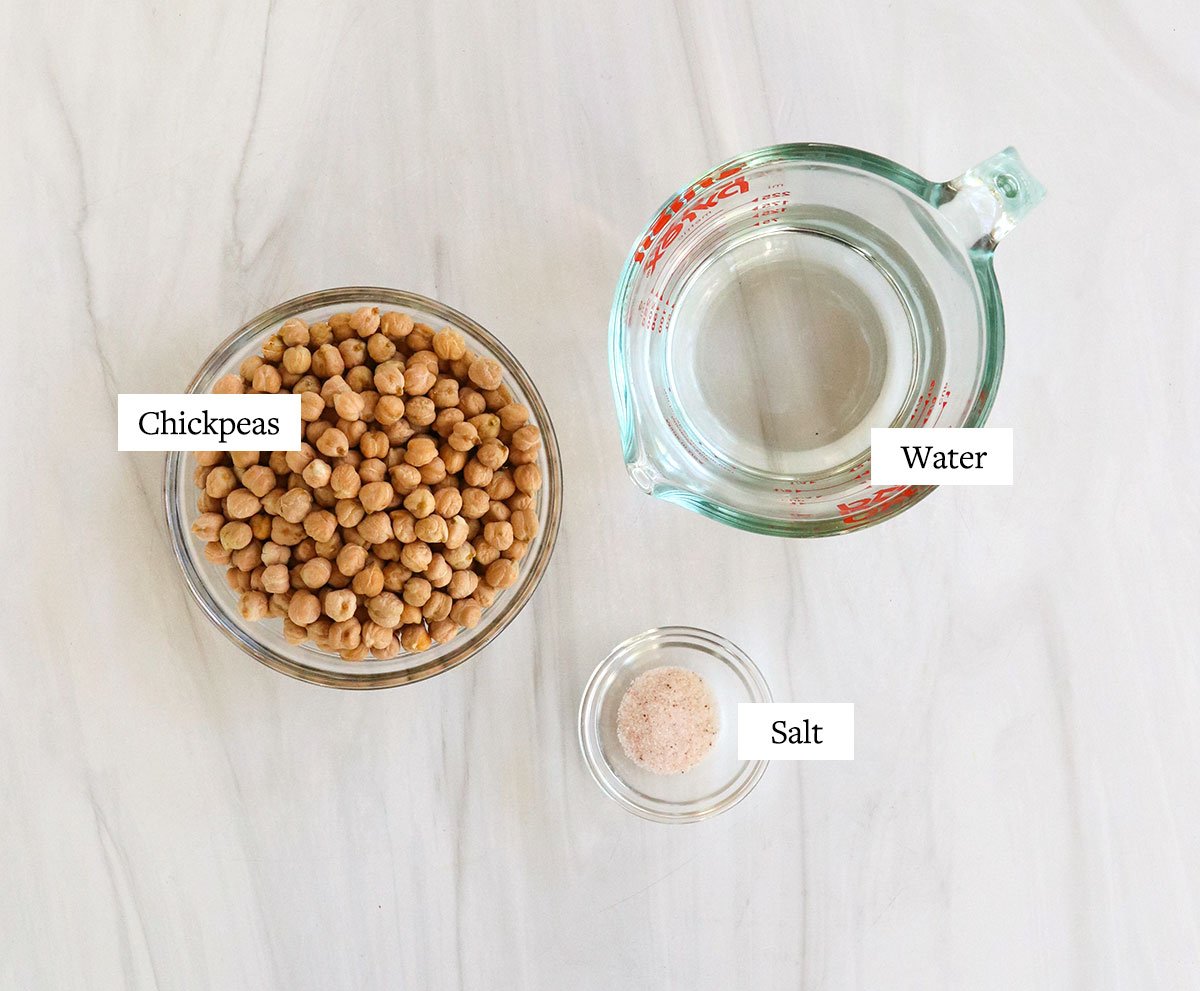
What do you need to cook chickpeas in the Instant Pot?
- Dried chickpeas (also called garbanzo beans)
- Water
- Salt
That’s it! In case you’re wondering, adding salt to the cooking water doesn’t seem to slow down the cooking process.
Typically, it’s the age of your chickpeas that will determine how fast they cook, so if you happen to have a batch that is taking longer than you expect it to, it’s probably because they are older beans. Luckily, it’s easy to add more cooking time if you need to.
Soaked vs. Unsoaked Beans
While you certainly don’t have to soak your chickpeas before cooking them, here’s a few reasons why people do.
1. They may be easier to digest. Soaking beans may help to remove the oligosaccharide content they contain. (Pressure cooking should help with this, too!) Removing this type of carbohydrate may help to reduce gas and bloating.
2. They are prettier. Soaked beans tend to plump up without splitting as they cook. As a result, the beans simply look more appealing! This is NOT the case if you soak the chickpeas in with baking soda, though. The baking soda will soften the skins, and they will start to fall off during the cooking process, so the finished beans won’t look quite as pretty in that case.
3. They cook faster. When you soak beans for 8 to 12 hours in advance, they cook in half the time compared to un-soaked beans.
With that being said, the choice to soak, or not to soak, is totally up to you. I’ll share both methods in the recipe card below.
How to Cook Instant Pot Chickpeas
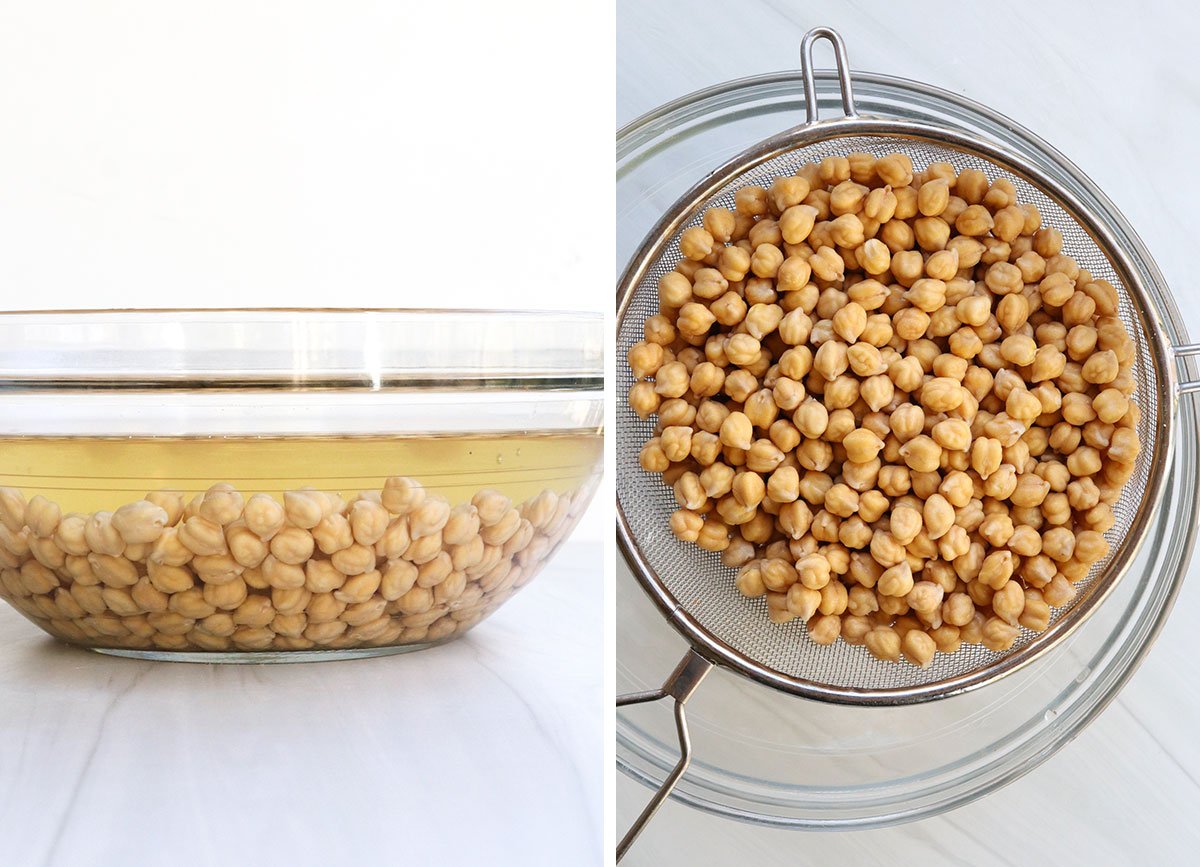
1. Soak the beans. (Optional)
This step is totally optional, so if you don’t have time for this, simply skip to the next step.
Rinse off the dried chickpeas in a mesh strainer or colander, and pick them over and remove any debris. Place the chickpeas in a large bowl and cover them water. Leave at least 3 extra inches of water over the chickpeas, to allow for them to expand. Set them aside to soak for 8 to 12 hours.
Quick Soak Method: If you’re in a hurry, but still want to benefit from using soaked beans, cover your beans with 3 inches of water in a large pot and bring the water to a boil over high heat. Let the beans boil for 5 minutes, then turn off the heat and let the beans sit in the hot water for at least 1 hour. Then you can cook as directed using the “soaked beans” cooking time.
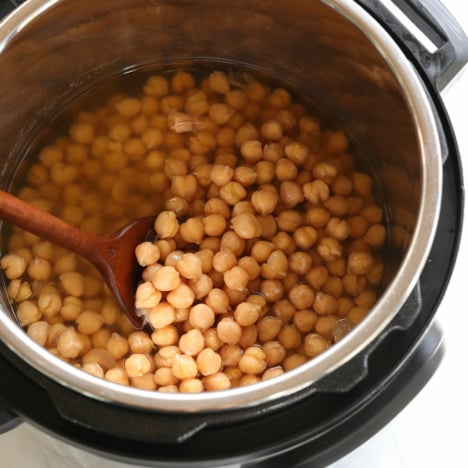
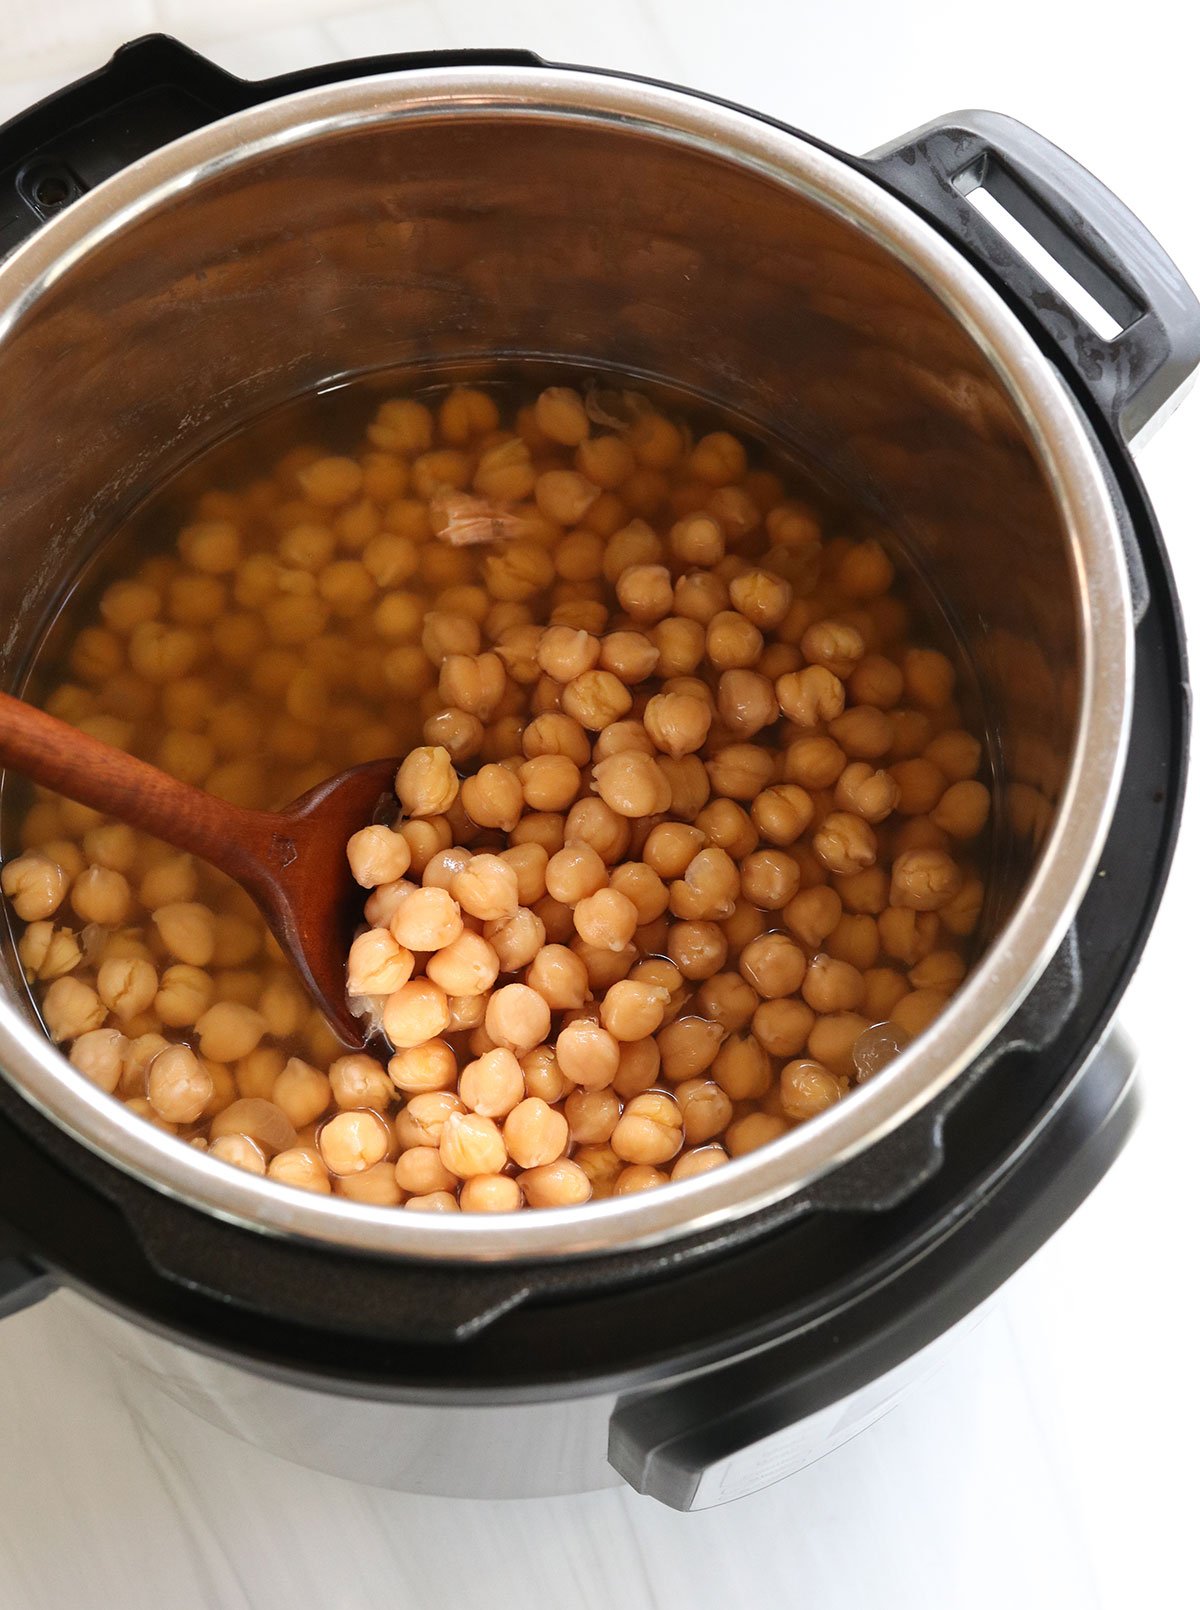
2. Pressure cook the chickpeas.
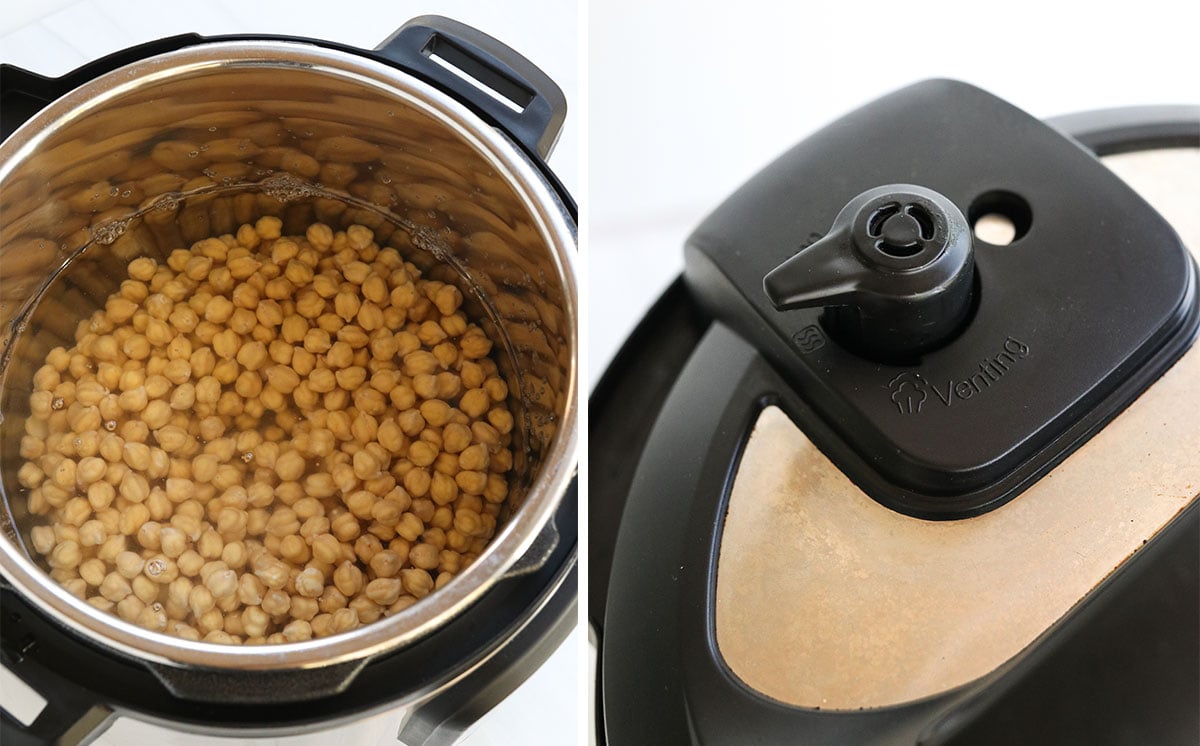
If you soaked the beans, be sure to drain the soaking water first, then add the drained beans to the stainless steel bowl of your Instant Pot. If you’re starting with unsoaked beans, be sure to rinse them off in a fine mesh strainer or colander first, remove any small pebbles, rocks, or debris that you see, and then add them to the Instant Pot.
Cover the beans with 7 cups of water and add in the salt. If you’d like to add any extra seasoning, like garlic, onion, or bay leaves, you can add those now, too. I tend to keep mine plain, so I can use them in other recipes just like canned beans.
Secure the lid on your Instant Pot, then move the steam release valve to the “Sealing” position. Use the Manual or Pressure Cook button on your machine to cook the beans on high pressure, using the guide below.
- For un-soaked chickpeas: Cook at high pressure for 50 to 60 minutes.
- For soaked chickpeas: Cook at high pressure for 15 to 20 minutes.
The cooking range will vary based on the age of your beans (older ones take longer to cook) and how soft you like the beans to be. I tend to err on the longer side, because I like my beans to be really tender, without risking a chalky texture in the center.
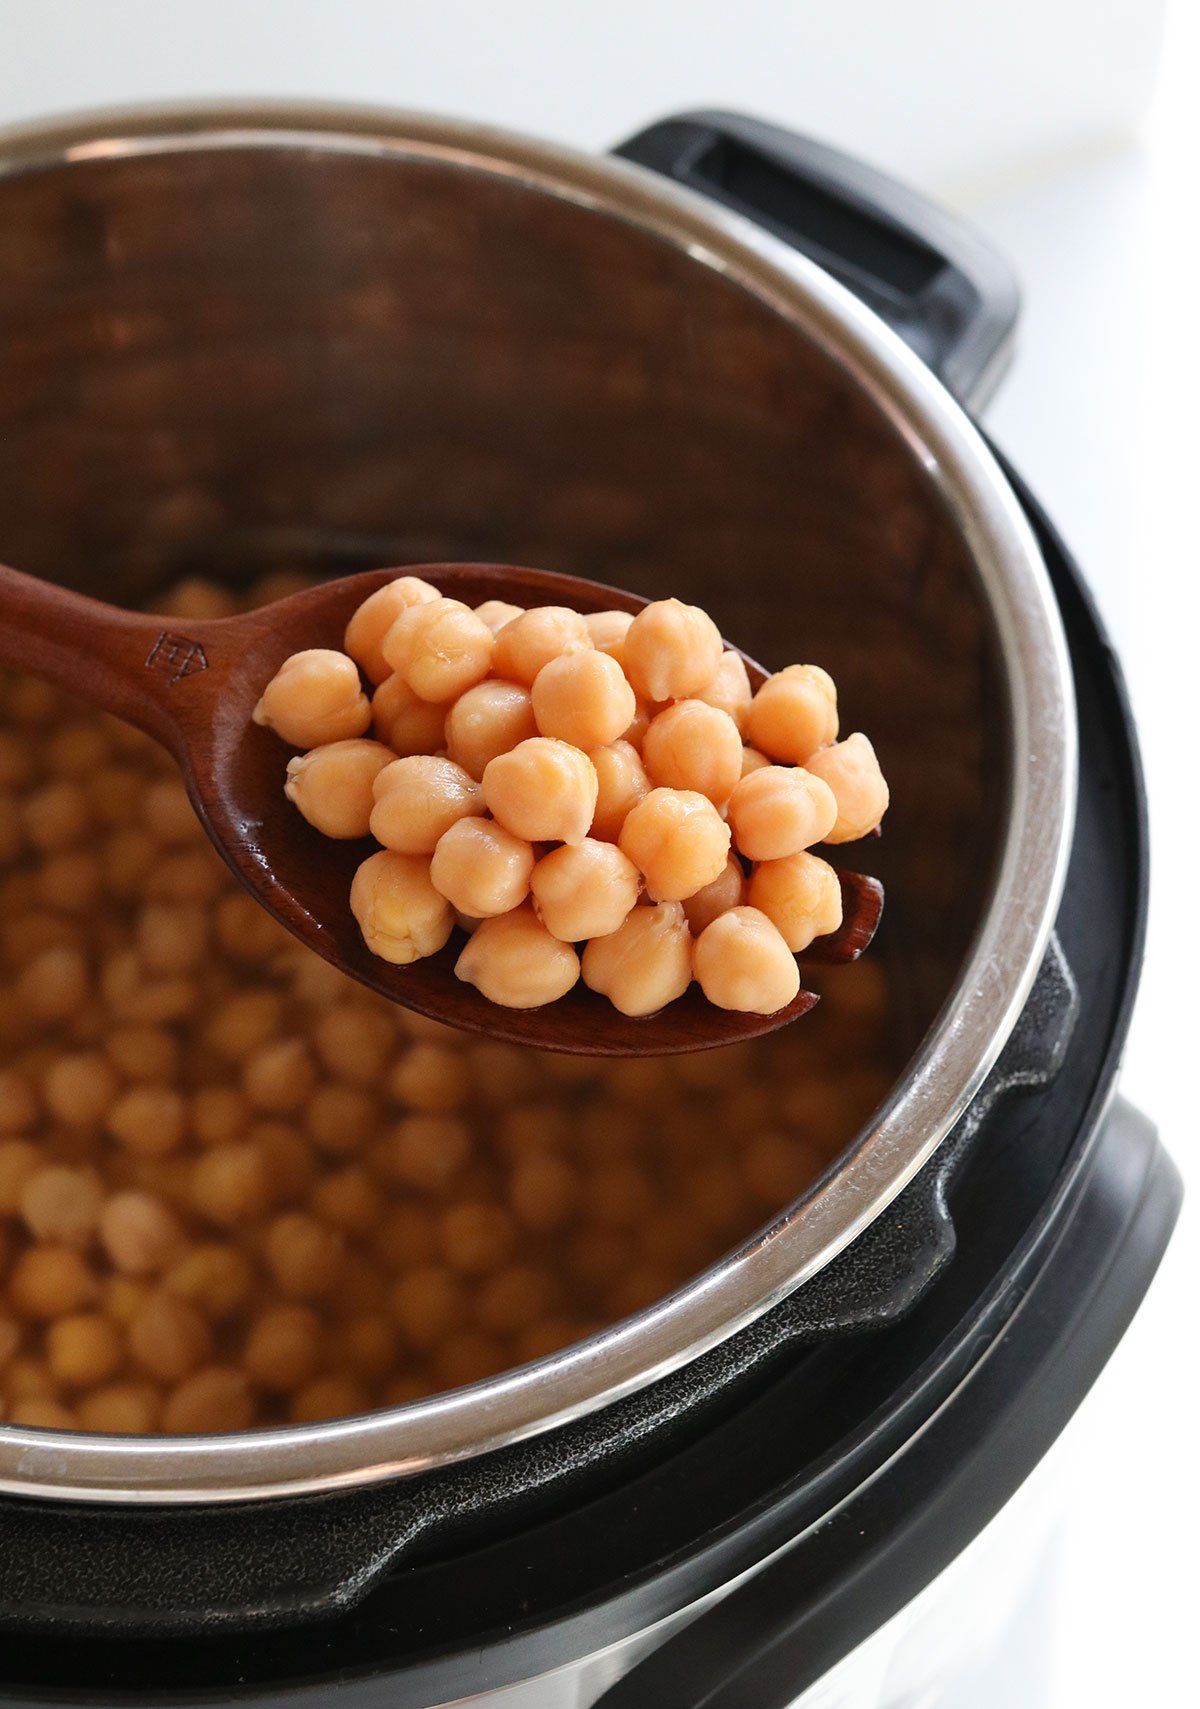
3. Natural pressure release.
As soon as the cooking cycle is complete, the Instant Pot will beep to let you know it’s done. The screen will read L0:00. You don’t have to do anything at this point!
Just wait and let the pressure naturally release for at least 10 minutes. After the screen reads L0:10 you can manually move the steam release valve to “Venting” to release any remaining pressure in the pot.
Safety Tip: Be sure to keep your hand safely to the side of the steam release valve, as the hot steam will release from the top of the valve. When the floating valve in the lid drops, you’ll know the pressure has been released and it’s safe to remove the lid.

4. Test the chickpeas for tenderness.
Use a fork to mash one of the chickpeas against the side of the pot. It should mash easily when the chickpeas are tender.
If they are not quite done yet, you can always return the lid to the pot (be patient– you’ll need to make sure the floating valve drops in order to close the lid again) and cook for another 10 minutes. After that, you can perform a quick release and check on the beans again.
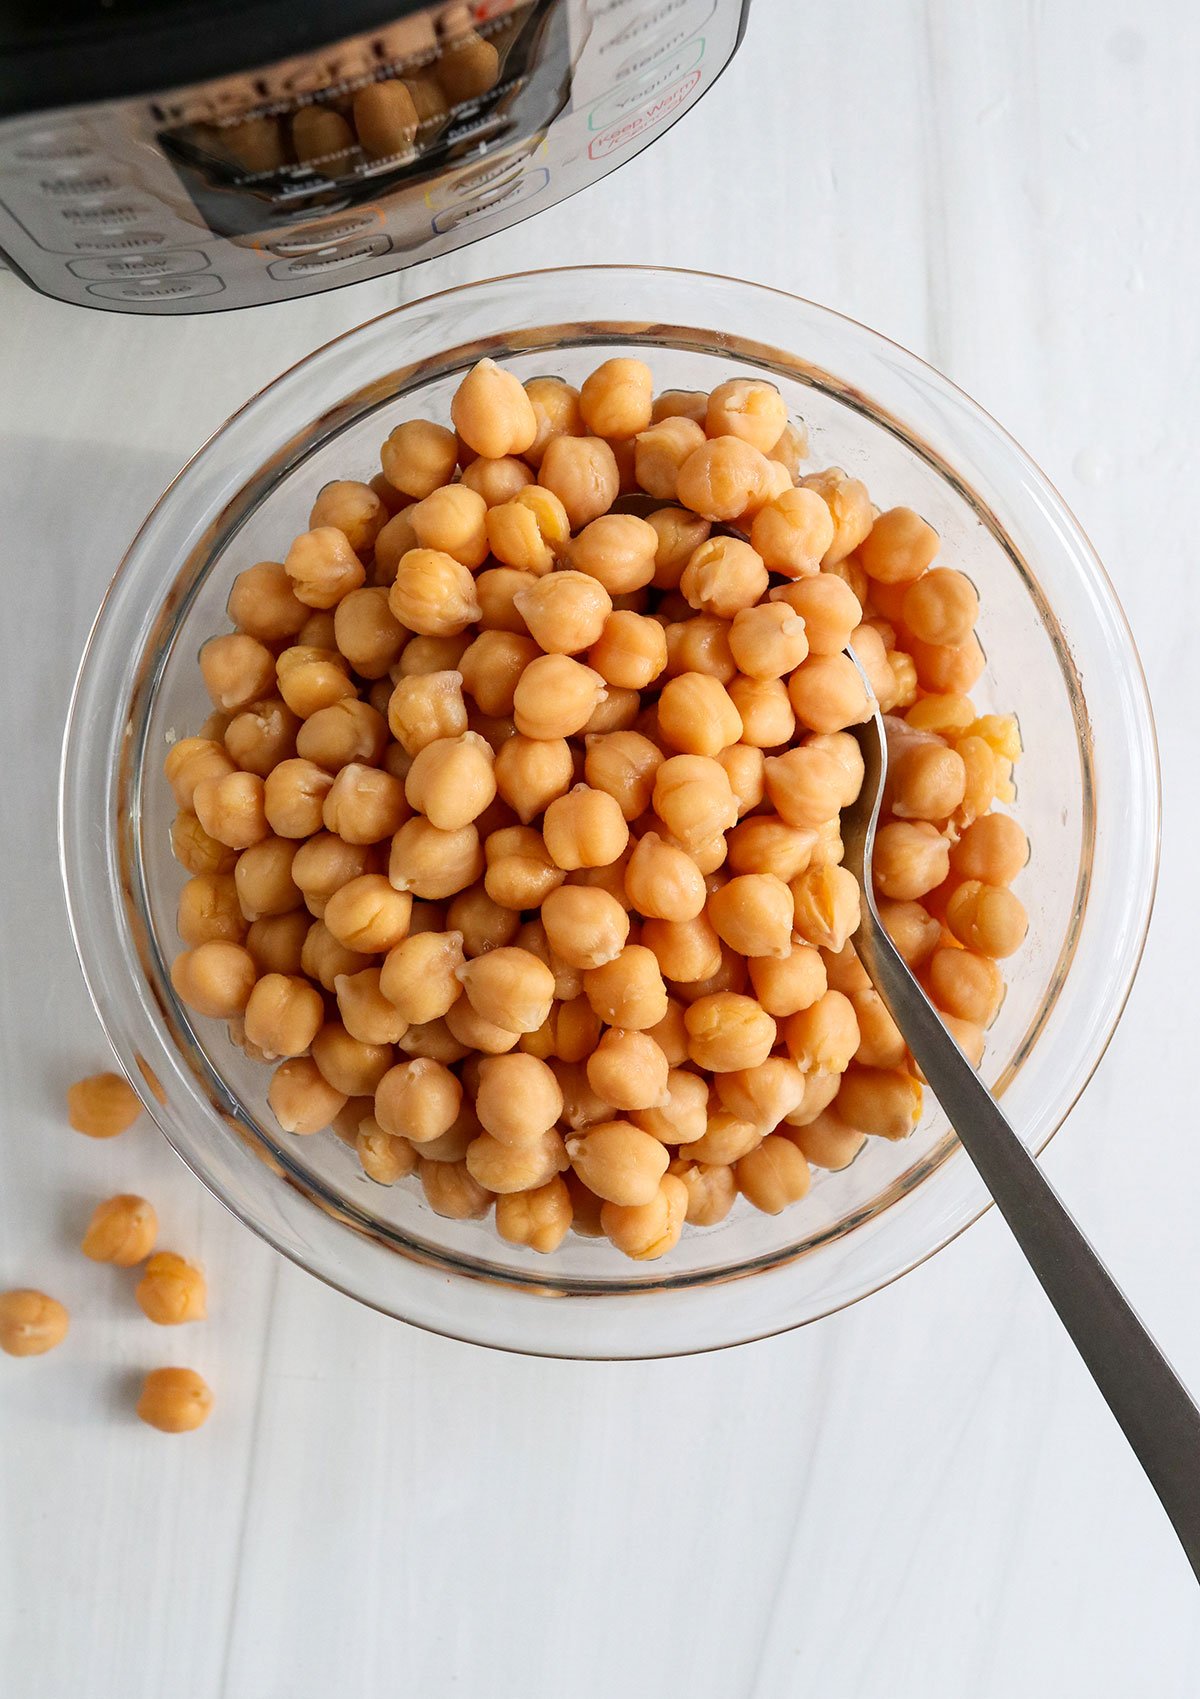
When the chickpeas are tender, you can drain away the cooking liquid and they are ready to use right away. Freshly cooked chickpeas make the best hummus!
Store leftover cooked chickpeas in an airtight container in the refrigerator for up to 1 week. (You can also save them in their cooking liquid, if you want to use that for an aquafaba recipe later.) See the freezing tips below for making them last even longer.
Frequently Asked Questions
How do you freeze chickpeas? If you won’t use all of the chickpeas you just cooked within a week, you can freeze them for up to 3 months. To do this, line a large baking sheet with parchment paper, and make sure it will fit on a flat surface in your freezer. (You can also use something smaller, like a plate, if needed.) Spread the chickpeas out in a single layer, and place them in the freezer for 2 hours, or until they feel quite firm.
Store the frozen chickpeas in an airtight container in the freezer until you’re ready to use them. You can replace one 15-ounce can of chickpeas with 1 1/2 cups of home cooked chickpeas in the future, and they will thaw quickly when you add them to soups. Or, let them thaw in the fridge overnight if you’d like to use them for a salad recipe.
How many cups is 1 pound of chickpeas? One pound of chickpeas is roughly 2 1/4 cups of dry chickpeas.
Should I add baking soda to the cooking water? Research suggests that adding baking soda to the cooking water will make it more alkaline and cook the beans faster. I tested this at home, and the result was totally unappealing! The outside of the beans do cook faster with this addition, but the insides are not more tender, so the beans fall apart and look unappealing. I don’t recommend this at all. (I tested 1 teaspoon of baking soda for this entire batch, FYI.)
You can add baking soda to the soaking water, if you’d like to, but be sure to drain and rinse the chickpeas before cooking them. In this case, the chickpea peels will fall off as you cook them. (Perfect if you’re planning to make hummus.)
How do you buy fresh chickpeas? It’s difficult to tell how old a dried chickpea is when you buy it from the store, but you’ll have a better chance of finding them fresh when you buy them from a bulk bin that has a frequent turnover. Packaged chickpeas on the shelf may have been packaged much for much longer, but the best way to know is to experiment with a few different brands or stores, to see how quickly the chickpeas cook for you.
Can I make smaller or bigger batches? Yes, if you would prefer to cook just 1 cup of chickpeas at a time, you can cover them with 4 cups of water and add 5 minutes to the cooking cycle, since the pot will pressurize faster. (The faster pressurization shortens the time that the beans are in the pot, so that’s why you add a few extra minutes.)
For a larger batch of beans, you can use a 3:1 ratio of water to dried beans, but be sure you don’t fill the pot more than half-way full for safety purposes. The beans will triple their size as they expand and cook.
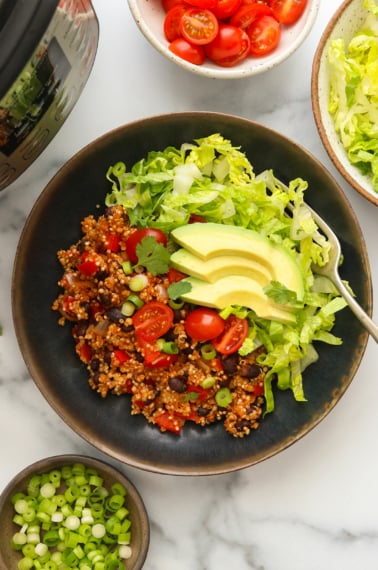
How to Use Cooked Chickpeas
Try these healthy recipes to use up your freshly cooked chickpeas:
- Mediterranean Chickpea Salad
- Chickpea Salad Sandwich (like tuna salad!)
- Crispy Roasted Chickpeas
- Vegetarian Chickpea Noodle Soup
- Thai Chickpea Curry

Ingredients
- 1 pound dried chickpeas
- 6 cups water
- 1 teaspoon fine sea salt (optional)
Instructions
NO-SOAK METHOD:
- Cover the dry chickpeas with 6 cups of water, add the salt, and secure the lid, moving the steam release valve to SEALING. Select the "Manual" or "Pressure Cook" button and cook at high pressure for 50 minutes (or up to 60 minutes for more tender beans), then allow the pressure to release naturally for 10 minutes. When the screen reads LO:10, move the steam release valve to VENTING to release the remaining pressure.
- When the floating valve in the lid drops, it's safe to remove the lid. Test the chickpeas for tenderness by mashing one against the side of the pot with a fork. Use the cooked beans right away, or store them in 1 1/2 cup portions in the fridge or freezer to replace a can of chickpeas in recipes. You should get 6 cups of cooked chickpeas (about 4 cans worth) in total.
SOAKED METHOD
- Cover the chickpeas with 3 inches of water in a large bowl, and let them soak 8 hours, or overnight. When you're ready to cook, drain the chickpeas, then add them to the bowl of your Instant Pot. (You can also use the quick-soak method mentioned in this post as an alternative.)
- Cover the drained chickpeas with 6 cups of fresh water, and the salt, if using, and secure the lid. Move the steam release valve to SEALING. Select the "Manual" or "Pressure Cook" button and cook at high pressure for 15 minutes (or 20 minutes for more tender beans), then allow the pressure to release naturally for 10 minutes. When the screen reads LO:10, move the steam release valve to VENTING to release the remaining pressure.
- When the floating valve in the lid drops, it's safe to remove the lid. Test the chickpeas for tenderness by mashing one against the side of the pot with a fork. Use the cooked beans right away, or store them in 1 1/2 cup portions in the fridge or freezer to replace a can of chickpeas in recipes. You should get 6 cups of cooked chickpeas (about 4 cans worth) in total.
Notes
Nutrition
If you try this Instant Pot Chickpea recipe, please leave a comment and star rating below letting me know how they turn out for you!


I tried this recipe this evening and it is a terrific recipe. I let my chickpeas cook for 17 mins and they are perfect for what I want to use them for. Thank you so very much!
We use this again and again – thank you!
Quick and easy!
Question… how can pressure cooking for 2 mins with 10 min NR allow for 12 min pressure cooking instead of 50 for dry beans…I am trying it right now. It just does not make sense to me!